What To Ask Before Approving a Promo Product Sample
What sample approval is really protecting
A sample is not a souvenir. It is the last low-cost checkpoint before tooling, plating, printing, assembly, packing, and freight turn a small miss into a full-order loss. Once a factory starts at MOQ, even a 0.5 mm dimensional drift, a 0.2 micron plating shortfall, or a weak attachment point can repeat across thousands of pieces.
Good approval practice answers four questions: does the item match the artwork, does it meet the material and finish spec, does it function as intended, and can the supplier reproduce it at scale. For a metal promo item, that means measured values, not just “looks fine.” If a lapel pin is specified at 28.0 mm wide, a realistic commercial tolerance might be ±0.3 mm on the body, ±0.2 mm on thickness, and no visible plating voids at normal viewing distance. Without that level of definition, approval becomes subjective and disputes become expensive.
Approve the sample as a production benchmark, not as a display piece. A factory can often correct a surface flaw later, but if the sample reveals the wrong alloy, a loose clasp, or a process that only works by hand, approving it anyway simply postpones the failure until the order is already boxed.
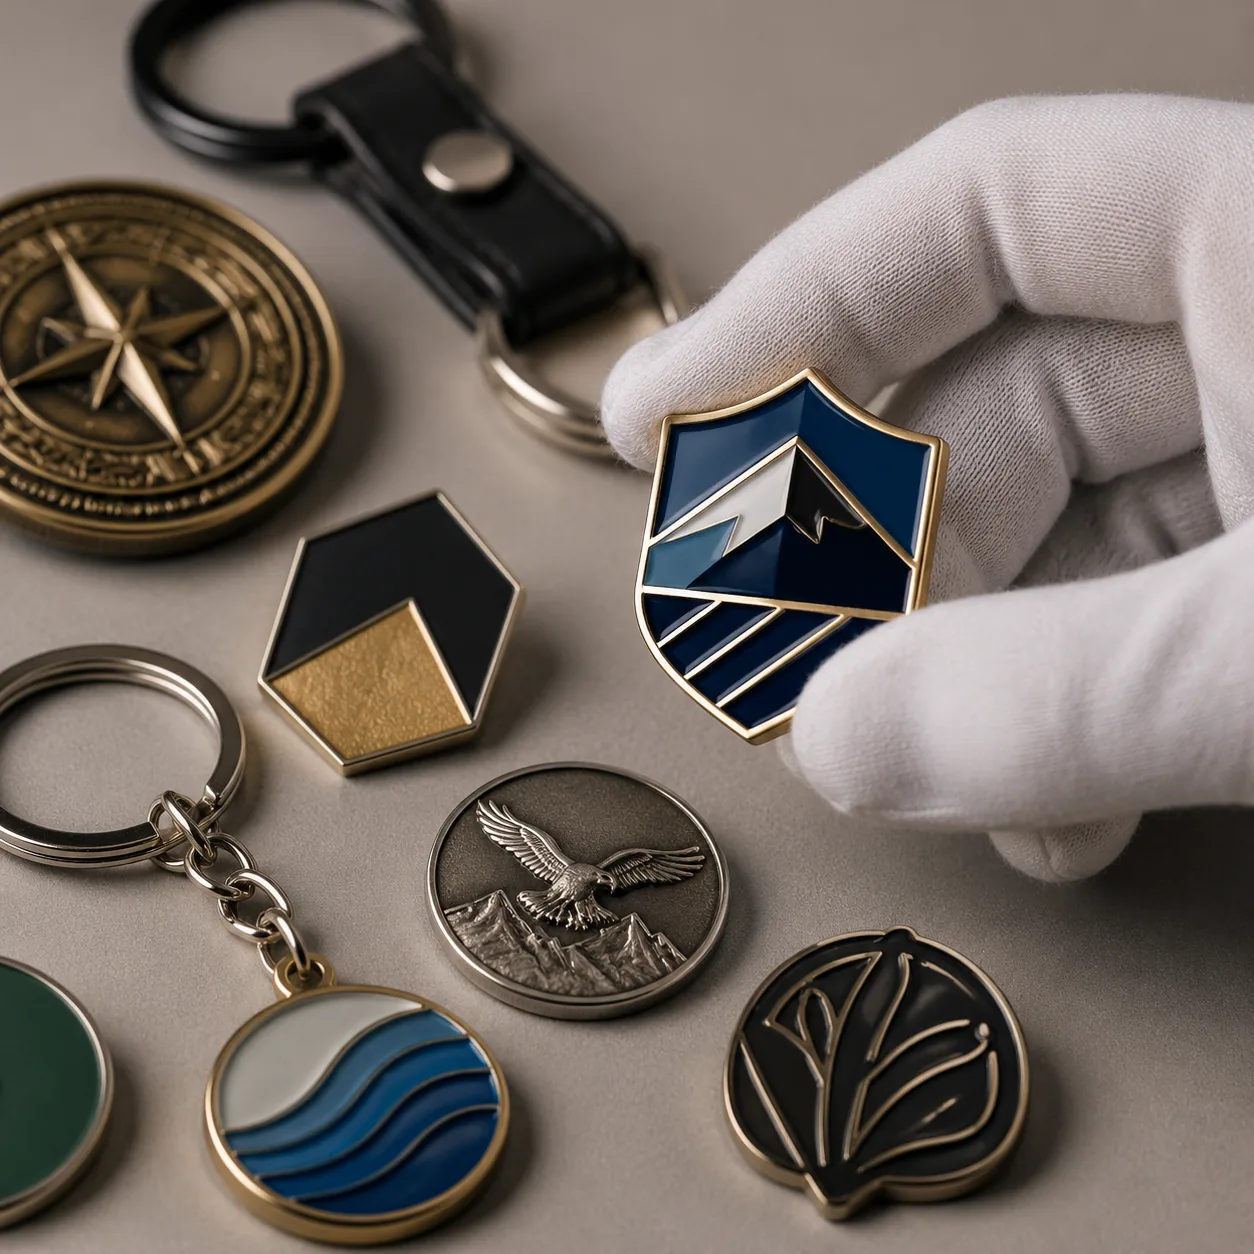
Which sample type are you approving?
“Send a sample” is too vague to control production risk. Buyers should distinguish between a blank sample, a pre-production sample, a color reference sample, and a golden sample, because each one proves something different. A blank sample verifies size, fit, and structure. A pre-production sample verifies the full build. A color reference sample isolates tone and finish. A golden sample becomes the locked benchmark for line production and disputes.
Separate structural and color approval when the product is sensitive. For example, approve the die line, thickness, and clasp function on a metal badge sample first, then approve Pantone matching on a second sample after the final ink or enamel batch is mixed. That prevents a good color match from hiding a dimensional error and prevents a perfect structure from being rejected because the paint was not final.
| Sample type | What it proves | Typical use | What to lock in writing |
|---|---|---|---|
| Blank or white sample | Size, profile, fit, tolerances | Early design review, tool verification | Body dimensions, hole location, fit stack |
| Pre-production sample | Material, plating, print, assembly | Final sign-off before mass production | Finish standard, function, packaging |
| Color reference sample | Pantone match, tone, gloss | Brand-sensitive items, reorders | Target Pantone, gloss level, acceptable ΔE |
| Golden sample | Locked reference for production | Line control and dispute reference | All measurable specs and photo reference set |
What exact questions should you ask the supplier?
A sample review should be a documented question set, not a feeling. Ask what material grade was used, what measured dimensions were taken, what coating or plating was applied, and what process window the factory is actually running. If the supplier cannot answer in numbers, you are reviewing a mock-up, not a production sample.
For metal promo items, ask for substrate alloy, plating system, plating thickness in microns, and any passivation or clear coat. Typical decorative nickel or chrome layers are often specified at 0.1 to 0.3 microns for light cosmetic work and 0.3 to 0.8 microns when a more durable appearance layer is requested. If the item needs wear resistance, write the spec into the PO instead of relying on the factory’s default finish. For enamel or paint, ask for cure method and film thickness if the factory can measure it. For soft goods, request fabric weight in GSM, thread density, stitch count, and shrink range after finishing. For printed items, ask for print method, color count, curing time, and whether the sample came from production tooling or a prototype tool.
Do not accept “same as sample” as a quality plan. Ask whether the sample includes any handwork, whether the final line uses the same machine setup, and whether the factory expects substitutions at MOQ. A common example is a keychain sample made with hand-polished edges and a production run finished by machine only; visually similar, the two can still differ on edge sharpness, sheen, and repeatability. If hand finishing disappears in production, the sample is not a valid promise.
- What exact material or alloy was used?
- What is the measured thickness, GSM, or gauge?
- What plating thickness or coating build was applied, in microns?
- What tolerance was checked on each critical dimension?
- Was the sample made on production tooling or a prototype tool?
- Are any steps manual on the sample but automated in production?
- What AQL level will govern the shipment?
Which specs should be checked first?
Start with function-critical dimensions, not the easiest-to-see details. On a pin, the body width, pin post location, clutch fit, and overall thickness matter more than a tiny shift in a printed logo. On a keychain, ring bore, split-ring fit, connector load, and swivel action matter more than a slightly different highlight on the back side. Aesthetic issues matter, but only after the parts that make the product work have been verified.
Set tolerances by product type and risk. A simple metal promo item may accept ±0.3 mm on the main profile, ±0.2 mm on thickness, and ±0.5 mm on hole or post position. A molded plastic item may need ±0.2 to ±0.4 mm on critical fit features. If the product must nest into packaging or another part, measure the assembled stack, not just the individual piece. A 0.4 mm mismatch in each component can become a 1.2 mm packaging failure when the final set is built.
For mixed promo sets, approve related items together so they look intentional. If a coin, pin, and lanyard ship as one campaign set, align the Pantone reference, plating tone, and carton insert dimensions at the same time. The most expensive rework is usually not one bad item; it is three good items that do not match each other.
| Control point | Why it matters | Typical acceptance target |
|---|---|---|
| Overall dimensions | Fit, display, packaging | ±0.3 mm to ±1.0 mm depending on item |
| Thickness or gauge | Weight, rigidity, feel | ±0.2 mm to ±0.5 mm |
| Attachment position | Wearability, balance, function | ±0.5 mm typical for small metal items |
| Color match | Brand consistency | Pantone match or ΔE target agreed in writing |
| Surface finish | Perceived quality, durability | No visible defects at normal viewing distance |
| Assembly alignment | Function and appearance | No visible misalignment under normal use |
How do you judge appearance without being fooled?
Visual approval needs controlled conditions. Warm office lighting can hide a plating mismatch, while daylight can expose color drift, polishing marks, or uneven gloss. Inspect the sample under neutral light, ideally around 4000K to 5000K, and then check it under the environment where the item will actually be used. A giveaway item meant for indoor events should not be judged only under direct sunlight if the end user will see it under warm banquet lighting.
Do not approve from a single front-facing photo. Rotate the sample, check the back side, inspect edges and corners, and examine transitions where enamel meets metal, print meets coating, or stitching meets binding. Many disputes come from rough backs, exposed substrate, or uneven fill that never appeared in the first photo set. For soft-touch finishes, test for rub-off with a dry white cloth. For coated metal, check for pinholes, bubbles, and shadowing on raised details.
Define acceptance in writing when appearance matters. For example: no visible pits larger than 0.3 mm at arm’s length, no color bleed into adjacent areas, no sharp edge that snags a cotton swab, and no bare metal at the highest points. That language gives the factory a measurable target instead of a subjective instruction like “make it premium.”
What should be in a sample approval checklist?
A checklist works when it forces the same review every time. That reduces subjective approvals, helps purchasing and QA sign off consistently, and gives the factory a clean reference for later batches. It is also the fastest way to prevent a spec sheet from drifting between email threads, PDF revisions, and verbal assumptions.
- Confirm the approved artwork version, file name, and date
- Verify material, size, and construction against the PO
- Measure all critical dimensions and record actual values
- Check finish, plating, print, or coating against the reference
- Inspect front, back, edges, and attachment points
- Test functional parts: clasp, ring, magnet, hinge, zipper pull, or tension
- Confirm packing method, insert card, and carton count
- Photograph the sample with a ruler or scale reference
- Sign off only if deviations are written and accepted
If the item is intended for retail, export, or child-accessible use, add checks for sharp edges, loose parts, odor, and small-part retention. For plated metal products, record whether nickel-free or low-lead requirements were requested and whether the sample visibly supports that claim. For coatings, note tackiness, rub-off, and early wear after a simple friction test. If the item includes magnets, verify pull force where relevant; a small magnet that feels fine by hand can still fail in packing or end use if the spec is not stated.
When should you reject a sample, and when should you negotiate?
Reject the sample when a critical spec fails: dimensions out of tolerance, wrong material, weak attachment, unsafe edge, wrong color family, or decoration that cannot be corrected without changing the process. Do not accept a structural defect on the promise that it will be better later. Structural problems scale badly and usually survive multiple production reminders.
Negotiate when the deviation is non-critical and you can document it precisely. A slightly different sheen on a hidden back surface, a minor print shift on the inside of the package, or a small non-functional tolerance stack may be acceptable if written down. The key is to define the exception tightly so the production team does not interpret it as open-ended approval.
If the supplier says a defect is “within normal range,” ask for the process window in writing. Compare that window to your tolerance. If their normal process produces variation wider than your requirement, you have three choices: tighten the process, loosen the spec, or change suppliers. More discussion does not close the gap.
What happens after approval?
Approval should lock three things together: the golden sample, the written spec sheet, and the reference photos. Those records should travel as a set so the buyer, inspector, and factory compare the same benchmark. If one of them is missing, later disputes become hard to resolve because each side remembers a slightly different version of the approved sample.
For larger orders, ask the supplier to keep one sealed master sample and one working reference sample. The sealed one is the dispute reference; the working one is for the line and the final inspection team. This is especially useful for multi-item promo programs where one design repeats across pins, coins, keychains, magnets, patches, or lanyards and the visual standard must stay aligned across items.
Link sample approval to a pre-shipment inspection plan with an agreed AQL. A common starting point is AQL 2.5 for major cosmetic or functional defects and AQL 4.0 for lower-risk accessory items, adjusted stricter if the product is safety-sensitive or brand-critical. For expensive or presentation-grade items, many buyers also specify 100% visual sorting for major defects and a tighter special limit on criticals. That keeps sample approval from becoming the end of quality control; it becomes the benchmark for the inspection that follows.
What should you do next?
Before you approve anything, turn the review into a written control exercise. Ask for measured specs, inspect the sample under neutral light, mark each deviation with a reason, and only then decide whether it is rejected, revised, or accepted with a documented exception. If the order matters, require a golden sample and a signed spec sheet before mass production starts.
For your next custom pin, keychain, coin, patch, or lanyard order, send a one-page checklist covering dimensions, materials, finish, packaging, and inspection criteria. A clear approval record prevents rework, shortens email chains, and gives both sides one standard to follow when the order moves into production.
Have a project? Send your artwork and target quantity and we’ll reply with a detailed quotation within 12 working hours.
Ready to get this made?
Send your sketch, target quantity and ship-date. Detailed quotation in 12 hours.


