QC Sampling Specs for Custom Pins and Keychains in 2026
Why "AQL passed" still ends in returns
The common failure is not skipping inspection. It is approving a PO that says only "inspect before shipment" while the buyer, factory, and third-party inspector each apply different standards. Cartons then land with mixed plating tone, pin posts off-center by 0.5 mm, epoxy domes with trapped dust, split rings that spring open, magnets with weak hold, or backing cards packed under the wrong SKU. The factory can still claim the lot "passed AQL" because no one fixed the actual defect definitions and sample plan in advance.
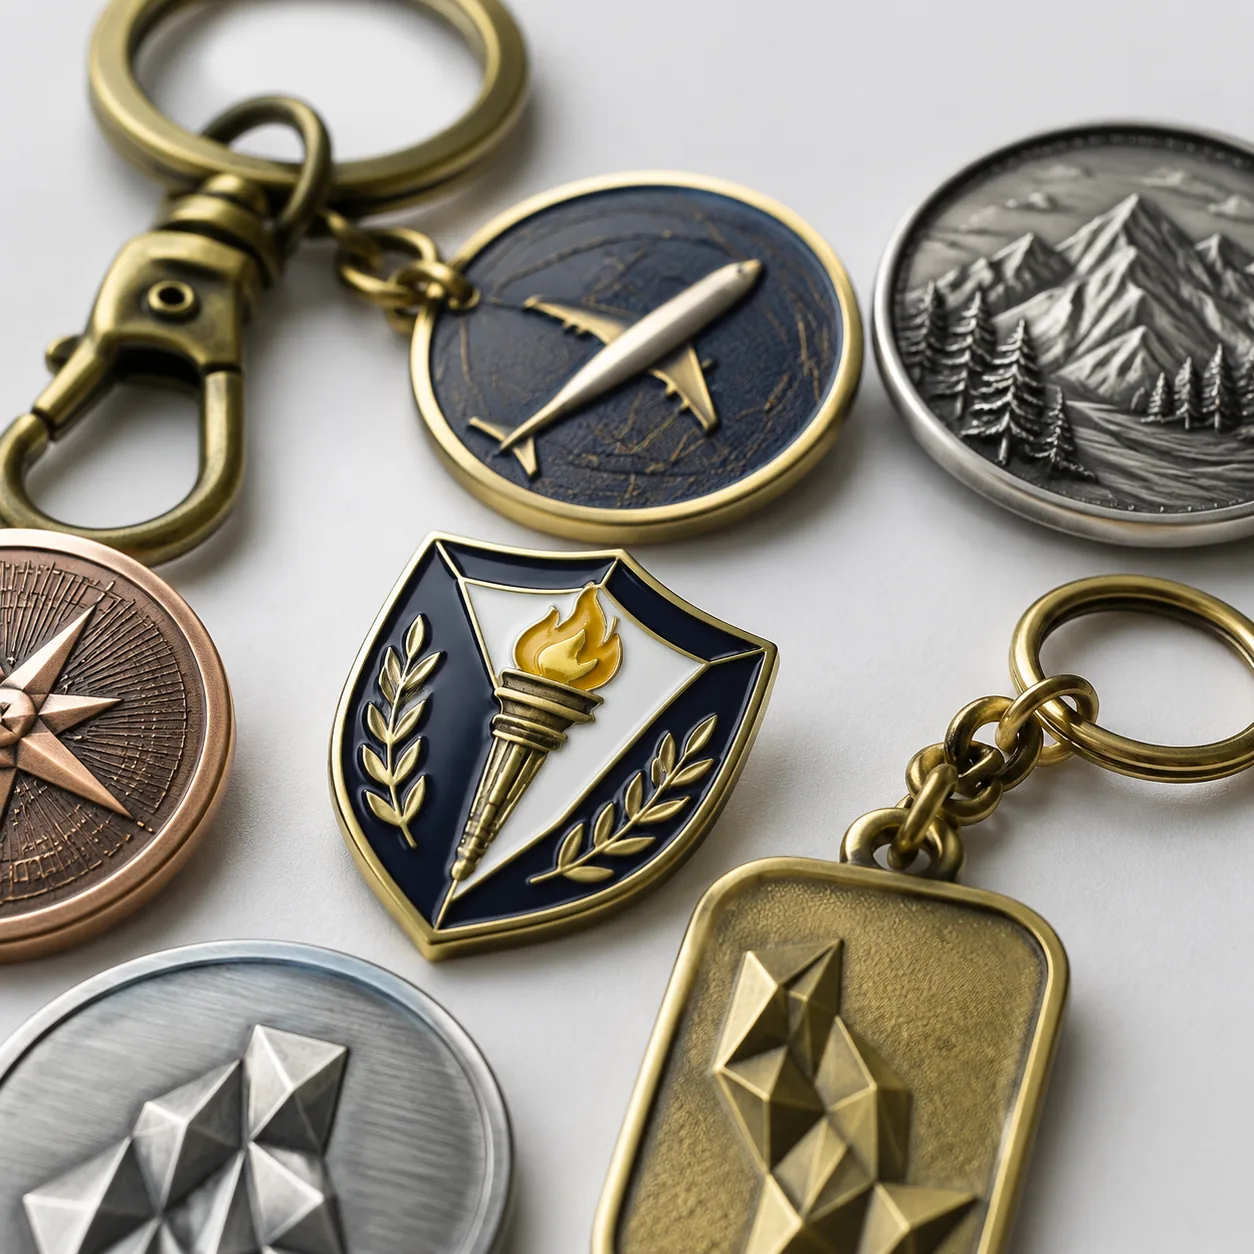
For custom enamel pins, keychains, medals, magnets, brooches, and challenge coins, the QC section has to convert design intent into measurable pass-fail criteria. At minimum, that means defining the lot, inspection standard, sample size, AQL by defect class, dimension tolerances, finish standard, function tests, pack-out, and carton requirements. If those lines are locked before mass production, disputes drop because the supplier, inspector, and buyer are all working from the same acceptance sheet.
The usable format is short spec lines that can be checked on the bench with a caliper, micrometer, scale, light box, pull gauge, tape measure, and carton count. If a line cannot be verified by a factory QC team or inspection agency in a few minutes per sample, it is too vague to protect the order.
1. Lock the sampling plan before production starts
Most arguments later trace back to a weak sampling framework. If a factory self-checks 80 units from a 20,000-piece run but your inspector uses ISO 2859-1 with a different code letter, both sides can inspect honestly and still reach opposite results. Put the lot definition, inspection level, and AQL in one line on the PO or approved QC appendix.
For most B2B metal promotional products, a practical default is: lot = per SKU, per plating finish, per attachment type, per packaging configuration, produced in one continuous production window; standard = ANSI/ASQ Z1.4 or ISO 2859-1; single sampling; normal inspection; General Inspection Level II; Critical AQL 0, Major 1.5, Minor 4.0. For museum retail, collector coins, luxury gifting, or close-up e-commerce photography, tighten to Major 1.0 and Minor 2.5. Critical defects should remain zero acceptance for safety, wrong logo, wrong country flag, wrong SKU, missing hardware, sharp hazardous edge, or small-part risk where not approved.
| Spec item | Recommended default | When to tighten |
|---|---|---|
| Lot definition | Per SKU + plating finish + hardware type + pack-out | Split lots if mixed clutches, mixed carding, mixed gift boxes, or serial-numbered units are packed together |
| Inspection standard | ISO 2859-1 / ANSI Z1.4, single, normal | Use tightened inspection after repeat failures or for launch-critical programs |
| Inspection level | General Level II | Move to Level III for premium retail or high-return e-commerce |
| Critical defects | AQL 0.0, Ac 0 / Re 1 | Keep at zero for safety, wrong item, wrong logo, missing component |
| Major defects | AQL 1.5 | Tighten to 1.0 for collector-grade finish and strict brand programs |
| Minor defects | AQL 4.0 | Tighten to 2.5 where shelf presentation matters |
| Rejected lot rule | 100% sort, corrective action, and re-submission | Require fresh random sample after rework, not cherry-picked pieces |
Use the standard sample-size code, not a factory-defined spot check. As a reference, a lot of 3,201 to 10,000 units at General Level II usually falls under code letter L, giving a 200-piece sample under single normal inspection. Typical acceptance numbers at that sample size are Ac 0/Re 1 for critical at AQL 0, Ac 7/Re 8 for major at AQL 1.5, and Ac 14/Re 15 for minor at AQL 4.0. That is the difference between an auditable result and a vague statement that "inspection passed."
Defect class must also match actual use. A small burn mark on the front face of a lapel pin is usually major because the product is viewed at close range. The same mark on the hidden back, with no corrosion risk and no functional impact, may be minor. Sampling only works if defect classification reflects visibility, use, and complaint cost.
2. Put numeric tolerances on size, thickness, weight, and artwork features
Many appearance complaints are really dimensional failures. A 35.0 mm keychain shipped at 33.8 mm changes border proportion, weakens narrow bridges, and may not fit the approved insert card window. A coin that is 6 to 8 percent light feels cheap in hand even if the artwork is technically correct. If dimensions are not written numerically, the inspector is forced into cosmetic judgment on what should be a measurement check.
For stamped iron or brass pins under 50 mm, overall size tolerance of +/-0.15 mm to +/-0.25 mm is usually realistic, depending on shape complexity and whether edges are straight or organic. For die-cast zinc alloy keychains and 3D pieces, +/-0.30 mm is a safer commercial tolerance. Metal thickness is commonly controlled at +/-0.10 mm for stamped items and +/-0.15 mm for cast zinc alloy. Pin-post location should normally be within +/-0.30 mm against the approved drawing; tighten to +/-0.20 mm only when alignment to backing cards, fixtures, or display panels matters.
Weight should be specified for coins, medals, bottle openers, magnets, and heavier keychains. A workable default is +/-5% versus approved sample weight for standard promotional goods and +/-3% for premium collector or reorder consistency. State whether the reference weight includes epoxy, spinner parts, acrylic inserts, magnet pads, or packaging accessories. Also define measuring points: width at widest point, thickness excluding epoxy dome, split-ring inner diameter, chain length, magnet centerline from top edge, and card-hole offset from artwork center.
Artwork features need numbers too. On soft enamel pins, minimum metal line width should typically be 0.25 to 0.30 mm, with recessed enamel depth around 0.08 to 0.12 mm; designs below that range tend to flood, blur, or chip at the edge. On silkscreened areas, print registration tolerance of +/-0.10 mm to +/-0.15 mm is standard for front display areas. If there is a laser-engraved serial number, define character height, position tolerance, and readability at 30 cm. These are simple additions, but they eliminate many of the "looks off" arguments after production.
3. Make plating, color, and epoxy measurable instead of subjective
Finish is where many otherwise good suppliers lose time because the buyer approved vector artwork but never fixed a physical finish standard. "Gold plating" is not a specification. The PO should identify finish type, expected appearance, comparison method, and any plating thickness requirement that matters to appearance or corrosion resistance.
Common decorative finishes include bright gold tone, imitation hard gold, bright nickel, matte nickel, black nickel, antique silver, antique brass, and dyed gunmetal. For standard decorative pins and keychains, a workable plating stack is copper strike as required by base metal, nickel underplate 0.5 to 1.0 micron, and decorative gold-tone topcoat around 0.03 to 0.05 micron, unless the factory uses a verified nickel-free system that was approved in advance. Compare appearance to a sealed production sample under D65 lighting at about 1000 lux. For antique finishes, do not demand impossible shade uniformity; define an acceptable range based on logo legibility, recessed shading consistency, and match to the approved sample set.
For soft enamel, imitation hard enamel, print, and epoxy, comparison must be against an approved production sample or sealed photo standard, not a monitor image alone. A practical front-face standard is: no obvious unit-to-unit color shift at 50 cm under neutral light; no underfill below metal line on primary display areas; no exposed base metal inside filled cells; no contamination between adjacent colors over 0.10 mm; no print blur or double image; no front-facing color void larger than 0.20 mm on the longest dimension. For epoxy domes, require smooth and level coverage, no sink deeper than 0.15 mm at center, no overflow onto plated borders, and no yellowing, haze, trapped dust, or flow line visible at 30 cm.
- Front-facing plating streaks, blistering, pits, peeling, or exposed base metal: major defect
- Visible color contamination, enamel underfill, enamel overfill, crack, or chip on primary display area: major defect
- Back-side tone variation only, with no corrosion risk and no functional effect: minor defect
- Epoxy yellowing, cloudiness, trapped particle, or flow line visible at 30 cm: major defect
- Antique finish too dark or too light versus sealed sample, reducing logo readability: major defect
If environmental durability matters, add a limited lab check instead of assuming decorative plating is sufficient. For example: no red rust on exposed metal and no blistering after 12 to 24 hours neutral salt spray on a retention sample, or no visible oxidation after 24 hours at 40 C and 90% RH. Decorative promotional plating is not jewelry-grade by default, so use conditions must be written if corrosion performance matters.
4. Test hardware by use: rings, clutches, clasps, magnets, and joints
A tray of parts can look fine and still fail on day one in the field. Hardware therefore needs its own functional test lines with method and acceptance criteria. The most common complaints are not visual: split rings that deform, jump rings that open, butterfly clutches that fall off, lobster clasps that stick, spinner rivets that loosen, and magnet pads that detach.
For metal keychains, specify split-ring diameter and wire gauge. A common build is 25 to 30 mm outside diameter in spring steel with 1.4 to 1.8 mm wire. A usable QC line is: no permanent opening greater than 1.0 mm, no connector break, and no abnormal deformation after 10 manual open-close cycles plus a 3 kg static pull for 10 seconds on the assembled chain set. For jump rings, require a closed joint with visible gap no greater than 0.10 mm and no opening after a 2 kg pull for 10 seconds. For lobster clasps, the gate must self-return fully after 20 hand cycles with no sticking or lateral looseness.
For lapel pins, retention matters more than back-face cosmetics. Butterfly clutch or rubber clutch should install and remove by hand without cutting a standard woven test swatch, remain engaged during 20 shake cycles, and show no accidental drop-off in normal handling. Pin-post solder joints should show full wetting, no visible cold joint, and no post detachment under a 3 kg pull for 10 seconds unless a thinner decorative post was approved. For pieces above about 45 mm width, two posts are usually more stable than one; if rotation risk matters, define post spacing against the approved drawing.
For magnets, specify real-world holding force on a known substrate rather than only asking for gauss. A practical standard is: assembled magnet holds one A4 sheet on 0.8 mm painted steel vertically for 24 hours with no slide greater than 5 mm, and the magnet pad does not detach under a 2 kg pull for 10 seconds. Gauss alone is not enough because substrate, adhesive area, air gap, and magnet position all change actual performance.
5. Control cosmetics by zone and viewing distance
One of the most useful upgrades is zoning cosmetic defects. This prevents wasted disputes over marks that are technically visible but commercially irrelevant, while protecting the surfaces the end user actually sees. A scratch across the face of a retail pin is not judged the same way as a faint tool mark on the hidden back.
Use three zones. Zone A: primary display surface. Assess at 30 cm under 800 to 1000 lux neutral light for 5 seconds. No obvious scratches, dents, pits, missing enamel, print blur, epoxy defects, plating voids, or foreign particles. Zone B: secondary visible surface such as edges, sides, and partly visible backs. Assess at 50 cm. Light polishing lines, minor antique wash variation, or small ejector witness may be allowed if not sharp, rust-prone, or distracting. Zone C: concealed surface. Assess at arm's length. Minor finishing marks, mold parting lines, and non-sharp back marks are acceptable if they do not affect function, corrosion resistance, or pack-out.
Tighten the cosmetic threshold for mirror-polish coins, transparent acrylic inserts, printed epoxy tops, and products sold through macro photography. For sandblasted fields, die-struck relief, and antique washes, define legibility and overall consistency instead of impossible absolute uniformity. The cosmetic standard should match the sales channel. Giveaway quality and collector-store quality are not the same program even when the artwork is identical.
6. Inspect packaging and cartons as part of product acceptance
Good units can still become a bad shipment during packing. Bent posts, rubbed plating, mixed SKUs, crushed cards, and chipped enamel often happen after final assembly. The QC block should therefore separate unit packaging, inner pack, and master carton requirements, each with measurable criteria.
For unit pack, specify bag size and thickness, card orientation, barcode location, insert count, spare clutch quantity, and any tissue or desiccant requirement. A common OPP bag spec is 30 to 40 microns for standard single pins and 40 to 50 microns for heavier keychains or boxed units. On backing cards, insertion or hole-position tolerance of +/-2.0 mm is workable for standard promotional goods; premium retail carding may need +/-1.0 mm. Polybags must be clean, sealed, and free of loose metal dust. If polished pieces are individually bagged, require no loose hardware inside the same bag that can rub the plated face in transit.
For master cartons, define board grade, gross weight, sealing, and shipping marks. For small metal accessories, keep export master-carton gross weight below 12 to 15 kg for manual handling. Heavy zinc alloy keychains, challenge coins, and magnet sets often perform better at 8 to 12 kg because corner crush and inner-box collapse rise fast as carton weight increases. Use legible carton marks with PO, SKU, quantity, carton number, gross/net weight, and country of origin where required. If mixed SKUs are allowed, require a carton map and inner labels so counting errors can be found during inspection, not after receipt.
7. Match the QC level to MOQ, FOB cost, and realistic lead times
Tighter QC costs money, but usually far less than remake freight, missed event dates, or e-commerce returns. In practice, a stricter documented QC plan on custom pins and keychains often adds 1 to 3 working days and roughly USD 0.01 to USD 0.06 per piece, depending on complexity, sorting, and pack-out. That is usually a rational trade if the product is branded, date-sensitive, or sold at retail.
As a 2026 buying reference, many factories still quote MOQ around 100 pcs per design for standard soft enamel pins and 100 to 300 pcs for die-cast zinc alloy keychains. Better price breaks normally start at 300, 500, and 1,000 pcs. A 1.25 inch soft enamel iron pin with standard plating, one color backing card, and butterfly clutch commonly lands around USD 0.60 to 0.95 FOB at 100 pcs, USD 0.40 to 0.68 at 300 pcs, USD 0.32 to 0.58 at 500 pcs, and USD 0.28 to 0.50 at 1,000 pcs. A 2 inch zinc alloy keychain commonly runs about USD 1.10 to 1.80 FOB at 100 pcs, USD 0.90 to 1.45 at 300 pcs, USD 0.78 to 1.30 at 500 pcs, and USD 0.65 to 1.15 at 1,000 pcs, depending on plating, epoxy, print layers, and hardware.
Lead times should be written in calendar days, not left as "ASAP." Tooling and pre-production sample lead time is often 7 to 10 calendar days after artwork approval. Mass production is commonly 12 to 18 calendar days after sample approval for standard pins and keychains. Add 2 to 4 days for antique hand-wipe finishes, epoxy domes, gift boxes, serial-number sorting, or multi-component sets. If third-party inspection is required, reserve at least 1 to 2 days before ex-factory date for sampling, report review, and any rework decision. That schedule discipline matters because weak QC choices made before sampling often do not show up until 5 to 7 weeks later, after ocean transit and receipt.
Put the QC block in the PO, not in a side email
The practical next step is simple: add a dedicated QC section to the PO or approved specification sheet. Include lot definition, sampling plan, dimensions, finish and color, hardware tests, cosmetic zoning, and packaging/carton criteria. Attach one approved artwork file, one sealed sample photo set, and one defect classification sheet with examples of critical, major, and minor defects. For mixed sets, write QC by SKU and by final assembled pack-out because the set often fails differently from the individual components.
For first orders, require the supplier to return the QC block with actual numbers filled in instead of replying only "noted." That forces unresolved points such as plating tone, ring wire gauge, magnet hold, card insertion tolerance, carton weight, or sample-size code to surface before mass production. It also gives the factory QC team and any third-party inspector a document they can actually enforce.
- Define lot, inspection standard, inspection level, sample-size code, and AQL on the PO before production starts
- Set numeric tolerances for size, thickness, weight, print registration, post position, ring gauge, and card alignment
- Use a sealed physical sample or approved photo standard for plating, antique shade, and color comparison
- Write functional test methods and thresholds for split rings, jump rings, clasps, clutches, magnets, and moving parts
- Inspect unit pack, inner pack, and master carton as part of product acceptance, not as an afterthought
- Tighten QC where complaint cost is high, but keep giveaway programs commercially realistic on tolerance and finish expectations
Have a project? Send your artwork and target quantity and we’ll reply with a detailed quotation within 12 working hours.
Ready to get this made?
Send your sketch, target quantity and ship-date. Detailed quotation in 12 hours.


