Pad Printing vs Screen Printing for Promo Items
Why this comparison matters
When a buyer asks for a logo on a pin, keychain, badge, pen, or lanyard, the artwork is only half the decision. The print process determines whether the logo stays crisp on a curved shell, holds opacity on a dark substrate, and survives handling without edge lift or color drift. Pad printing and screen printing can both produce acceptable samples, but they respond very differently to shape, ink load, cure method, and registration tolerance.
For promotional products, the right choice usually comes down to four variables: substrate shape, image size, color count, and order volume. Pad printing is generally the better fit for compact metal or plastic parts with curvature, recesses, or interrupted surfaces. Screen printing is usually better for flat items with larger print fields, especially fabric, lanyards, flat PVC, cartons, and sheet goods. The buyer’s goal is not to choose the better process in theory, but the one that gives acceptable quality at the lowest total risk and the lowest reject rate.
Quick spec comparison
Use this table as a shortlisting tool before quoting. The ranges below reflect common factory capability for promo items, not laboratory limits. Actual performance depends on ink chemistry, substrate treatment, fixturing, mesh or pad condition, and cure control.
| Spec | Pad Printing | Screen Printing |
|---|---|---|
| Best substrate shape | Curved, recessed, irregular, small parts | Flat or gently curved, larger print fields |
| Typical minimum line width | 0.20-0.25 mm | 0.30-0.40 mm |
| Typical minimum text height | 1.2-1.5 mm | 1.5-2.0 mm |
| Typical registration tolerance | ±0.15-0.25 mm | ±0.25-0.40 mm |
| Ink film thickness | About 3-8 microns per pass | About 10-20 microns per pass |
| Common color count | 1 color per pad; multi-pass possible | 1 color per screen; one screen per color |
| Typical setup cost | USD 25-80 per color or position | USD 20-60 per color or screen |
| Typical FOB unit range at 500 pcs | USD 0.08-0.35 | USD 0.05-0.25 |
| Best use case | Small logos on pens, keychains, badges, lighters | Lanyards, flat PVC, fabric patches, cartons |
| Common failure mode | Distortion on soft, oily, or highly contoured surfaces | Blur, uneven coverage, or edge lift on uneven surfaces |
Where pad printing wins
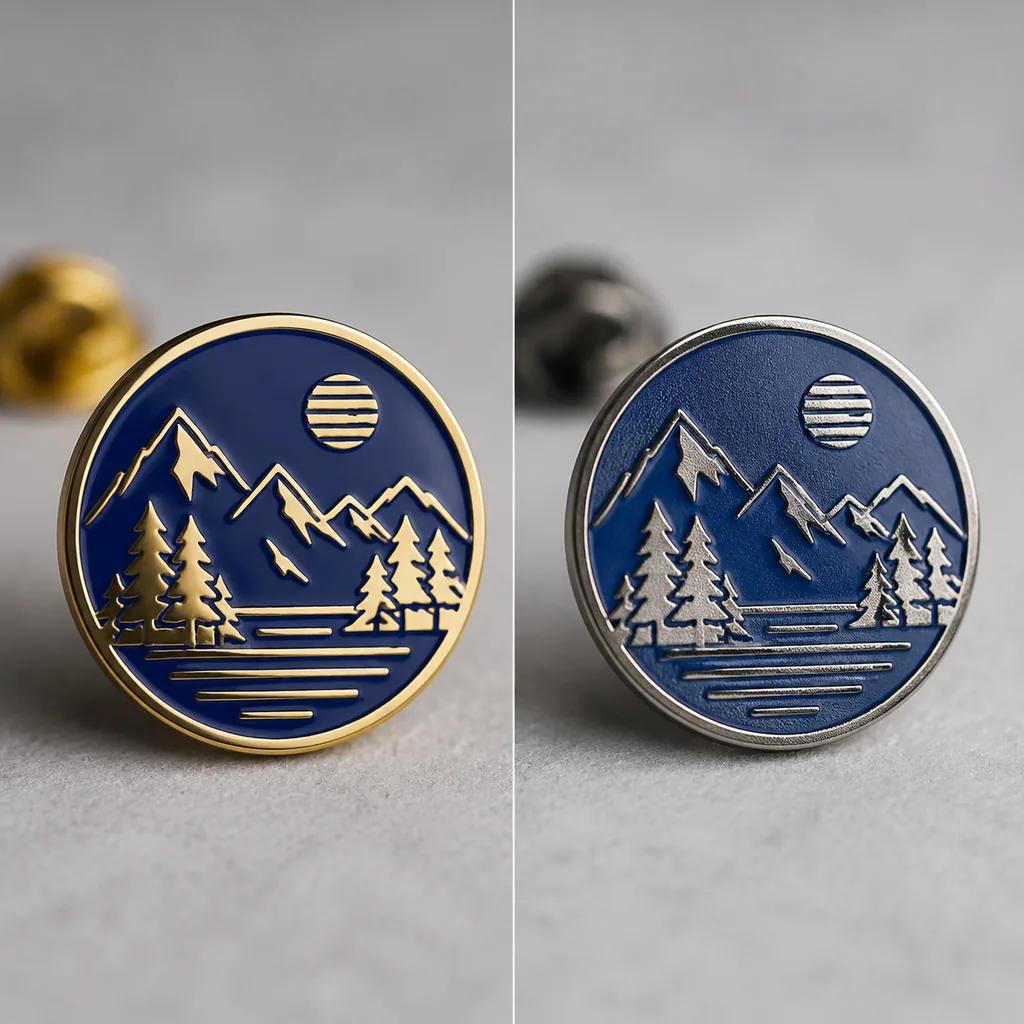
Pad printing transfers ink from an etched plate to the product with a silicone pad, which lets the print conform to the part instead of requiring a perfectly flat contact area. That is why the process is common on pens, keychains, badge backs, lighters, USB housings, small metal accessories, and molded plastic parts. Its main advantage is reach: the pad can wrap over shallow curves and drop into small recesses that a screen cannot cover evenly.
In practical sourcing terms, pad printing is strongest when the decorated area is compact, usually under about 25 x 25 mm, with line width at or above 0.20 mm and text height above 1.2 mm. On ABS, painted plastic, plated zinc alloy, anodized aluminum, and many coated metals, a well-tuned pad print can hold a clean edge and stable spot color if the surface is clean and the ink is selected correctly. Solvent-based inks are still common for metal and plated parts; UV-curable inks are often preferred on plastics where fast cure, low odor, and shorter handling time matter.
Pad printing becomes less efficient when the image gets wide, dense, or heavily layered. Each additional color typically adds another plate and another alignment step, so a 3-color logo on a 3,000-piece run can still be economical, but a broad 4-color fill area quickly becomes slower and more sensitive to drift. A factory should be able to tell you the plate size, pad durometer, ink type, and cure method. For small logos on stable parts, a first-pass positional tolerance around ±0.2 mm is realistic; tighter control should be proven on the actual substrate, not assumed from artwork alone.
Surface condition matters more than many buyers expect. Oily molded parts, powdery coatings, textured finishes, and parts with release-agent residue can cause adhesion variation unless the factory uses cleaning, flame treatment, corona treatment, or a primer step. Ask whether pretreatment is included in the quote and whether the supplier has a re-run method if the first adhesion test fails. If the job is for a plated or painted part, request a cross-hatch or tape test result on the same finish, not a generic claim of adhesion.
Where screen printing wins
Screen printing is the stronger choice when the substrate is flat, the design uses bold shapes, and opacity matters. Ink is pushed through a mesh stencil onto the surface, so the process deposits more material than pad printing. That thicker deposit is useful on dark substrates, especially for white, yellow, and other low-opacity colors. It is also why screen printing is standard on lanyards, flat PVC, fabric patches, cartons, decals, and many flat promotional panels.
For buyers, the biggest advantage is visual density. A well-made screen print can deliver a smoother solid fill, especially on large areas where a thin transfer would look patchy or weak. On fabric, a typical mesh range is 80-120 mesh for general promo work, with finer meshes for detail and coarser meshes for heavier deposit. Ink film thickness around 10-20 microns is common for promotional applications, which is enough to improve opacity without making the print overly stiff. On lanyards, a 1-color or 2-color graphic is often faster and cheaper to run than the same design in multiple pad-print passes.
Screen printing becomes unreliable when the substrate stops being flat. Curved shells, domed badges, narrow rings, and recessed areas create uneven screen contact, which can lead to ghosting, edge blur, or missed corners. It is also less forgiving on very small logos because the mesh and squeegee can soften fine detail. Buyers sometimes choose screen printing because the quoted unit price looks lower, but the process only stays economical when the fixture is simple, the print field is stable, and the reject rate stays low.
On fabric items, curing is part of the print specification, not an afterthought. Plastisol, water-based, and solvent systems behave differently in wash, rub, and heat exposure. For a standard lanyard or fabric patch, the supplier should be able to state cure temperature, dwell time, and the expected rub resistance. A practical promo spec is no visible ink loss after 50 dry rub cycles for short-term event use, or 100+ cycles for items intended for repeated handling. If the item needs repeated washing or outdoor use, ask for the exact ink system and any test data instead of accepting a generic durability claim.
Decision rules that reduce risk
The right process comes from the interaction of shape, artwork, and volume. A process that looks inexpensive per unit can become expensive if it drives rework, rejects, or a second sample round. The buyer’s real question is simple: which method gives acceptable appearance at the lowest total risk for this item and this order size?
- Use pad printing for curved, recessed, or interrupted surfaces, especially when the decorated area is under 25 mm wide.
- Use screen printing for flat products with larger logos, strong fills, or graphics that need higher opacity.
- Avoid pad printing for broad solid fills where edge consistency matters across a large area.
- Avoid screen printing on domed, textured, or highly contoured parts unless the supplier has a proven fixture and prior samples.
- Ask for a physical proof on the actual substrate before approving color sequence, registration target, and finish.
Artwork complexity matters as much as shape. Fine text, thin rules, and compact logos usually survive pad printing better on small items because the transfer is localized. Large spot colors, bold icons, and simple block graphics usually look better in screen printing because the ink layer is heavier and more uniform. If you are unsure, ask the supplier to quote both processes against the same artwork, same packaging requirement, and same approval criteria so you can compare setup cost, unit price, and yield risk side by side.
A useful rule of thumb is this: if the logo fits comfortably within a 20-25 mm square and the part has any curvature, start with pad printing. If the print field is flat and at least 40-50 mm wide, start with screen printing. That rule is not absolute, but it quickly filters out unsuitable quotes and saves sample rounds.
Cost, MOQ, and lead time
At low quantity, setup cost dominates. For small promo orders of 300-500 pcs, pad printing often lands around USD 0.06-0.20 per color per piece for simple single-location work, with setup fees around USD 25-80 per color or position. Screen printing on flat items may show similar setup fees, but the economics usually improve faster as volume rises because print speed is higher and the reject rate is lower on flat stock.
A realistic MOQ for both methods is often 100-300 pcs for repeat customers or stock items, but many factories prefer 300-500 pcs per design when new plates, screens, or custom colors are required. Below that, setup cost can overwhelm the piece price. For multi-color work, common quotation tiers are 500 pcs, 1,000 pcs, 3,000 pcs, and 5,000 pcs, with better FOB pricing at each step as setup is spread over more units.
Lead time is usually driven by artwork approval, color matching, and fixture readiness rather than the print stroke itself. A straightforward pad-printed order may ship in 7-12 days after approval. Screen printing on flat stock often ships in 6-10 days when screens and inks are already confirmed. Add 2-4 days if the job needs PMS matching, special inks, or a first-article correction round. If the supplier must build a new jig for a curved part or prepare a new mesh for fine detail, the timeline can move closer to 10-15 days.
For budgeting, a practical FOB range for common promo items is this: pad printing on small metal or plastic parts often lands around USD 0.08-0.35 per unit depending on color count, substrate, and packing; screen printing on flat lanyards, flat inserts, or fabric patches often lands around USD 0.05-0.25 per unit at moderate volume. These are sourcing ranges, not fixed market prices, but they are accurate enough for early approval and supplier comparison.
Quality controls buyers should specify
A print process is only as good as the acceptance criteria attached to it. Buyers should define registration tolerance, minimum line width, color target, adhesion level, and abrasion expectation before production begins. For promo items, a common inspection framework is AQL 2.5 for major defects and AQL 4.0 for minor defects, but only if the defect definitions are written in plain language and tied to measurable examples.
A good RFQ should specify the substrate, actual print area in millimeters, number of colors, edge distance, surface finish, and whether the part is curved, textured, plated, or coated. If the item is metal, say whether the finish is polished, matte, anodized, plated, powder-coated, or painted, because each one changes ink wetting and adhesion. If you need a white underbase, overprint, or protective varnish, state it explicitly; otherwise the quote may cover only the visible top layer.
Tolerance language should be practical. For most promo work, a visually acceptable color match under standard viewing distance is more useful than lab-only precision. If tighter brand control is needed, require approval under D65 or daylight-equivalent lighting and ask for one signed master sample. For small logos, a typical positional tolerance of ±0.2 mm is a reasonable target; for larger graphics, ±0.3-0.4 mm is often acceptable if the image remains centered and legible.
Inspection should also cover durability. Ask for adhesion testing appropriate to the substrate, such as cross-hatch adhesion on coated parts or a simple rub test on fabric. For handled items, a practical spec is no visible ink loss after 50 dry rub cycles for event-use products, or 100+ cycles for products expected to circulate longer. If the item will be bent repeatedly, exposed to alcohol, or used outdoors, the ink system should be validated accordingly rather than assumed from a standard sample.
When neither process is the right answer
There are situations where pad printing and screen printing are both compromises. If the artwork needs photographic detail, gradients, tiny reversed text, or variable data, UV printing, digital printing, laser engraving, or enamel-style decoration may be more stable. If the item will be flexed repeatedly or exposed to solvents or outdoor weather, the substrate finish or decoration method may need to change entirely.
Neither method is ideal when the buyer wants high opacity on a dark, textured, or heavily coated surface while holding a very low price target. In that case, the best fix is often to simplify the graphic, enlarge the print area, change the base color, or accept a second decoration step such as an underbase. The costly mistake is approving a process that looks fine on a proof but breaks down once line speed, handling, and packaging are added.
For example, a 12 mm logo on a curved metal keychain with a white fill is usually a pad-print job, but a 50 mm one-color logo on a flat polyester lanyard is usually a screen-print job. If the buyer asks for a photo-like illustration on a molded pen barrel, neither method is a great fit, and a supplier should be asked to propose digital or UV decoration instead of forcing an unsuitable print process.
What to send in the RFQ
If you are sourcing now, send one RFQ with the same artwork quoted in both processes and ask the factory to recommend the primary method and the fallback method. Include the substrate drawing, actual print area, quantity tier, color count, packaging method, and target approval date. Ask for a sample on the real material before the PO is released, and require the quote to show setup, unit price, and any extra charges for fixtures, screens, plates, or special inks.
A simple buyer workflow works well: if the surface is flat and the logo is larger, start with screen printing; if the surface is curved or the print area is compact, start with pad printing. Then lock the spec with line width, registration tolerance, AQL, finish expectations, and cure method before mass production. That sequence removes most of the ambiguity that causes avoidable rework on mixed promo orders.
Have a project? Send your artwork and target quantity and we’ll reply with a detailed quotation within 12 working hours.
Ready to get this made?
Send your sketch, target quantity and ship-date. Detailed quotation in 12 hours.


