How to Spec Backing Cards for Custom Pins
Q: Why does the backing card matter at all?
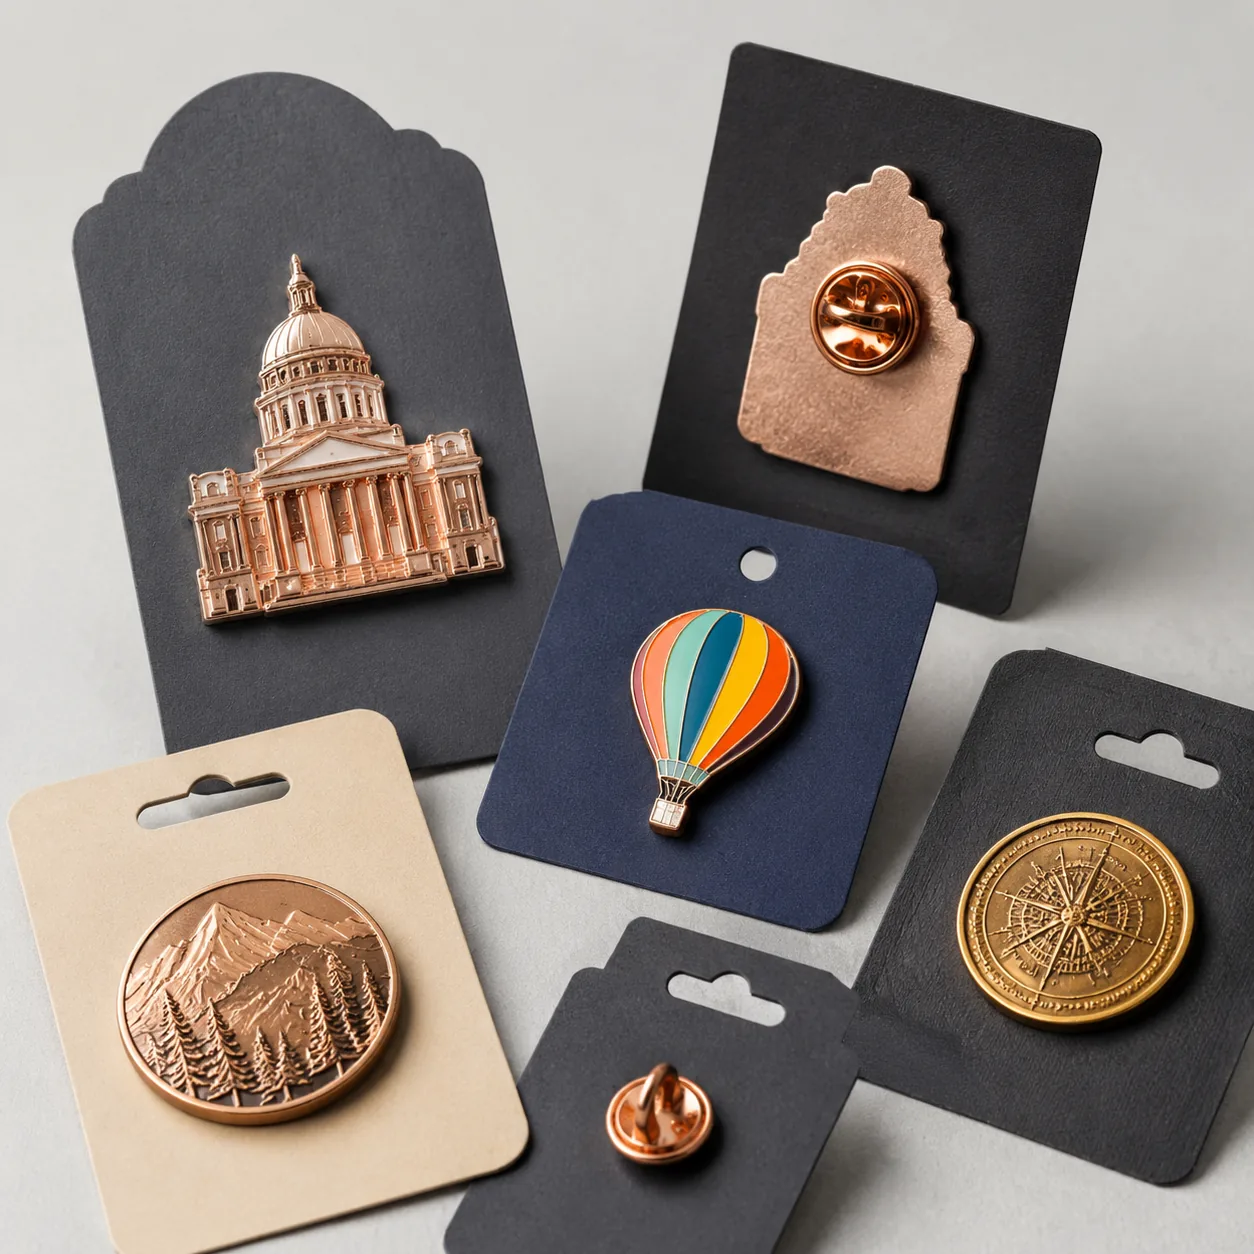
For custom pins, the backing card is not disposable filler. It carries the branding, supports hang-sell display, protects the finish from scuffing, and controls how the product looks when a buyer first touches it. A pin can pass dimensional inspection and still feel low value if the card curls, the print shifts, the slot tears, or the mount point is off-center.
Procurement risk starts when the card is treated as an afterthought. If the RFQ does not lock card size, board grade, print method, finish, and mounting geometry, factories may substitute lighter stock, widen the hole, or adjust the slot to simplify assembly. That creates crooked pack-out, damaged posts, or inconsistent shelf presentation across batches. In retail and gifting, that inconsistency is visible immediately.
The safest approach is to define the backing card as a controlled component with its own drawing, tolerances, and approval sample. For multi-SKU programs, that control matters even more than the pin artwork because the card is usually the only surface that carries compliance text, barcode placement, and merchandising information.
Q: What backing card specs should be fixed in the RFQ?
Start with measurable specs. The most common finished formats are 70 × 100 mm, 80 × 120 mm, and 90 × 140 mm, but the right size depends on pin diameter, number of pins per card, and whether the pack must hang on a retail peg. For a single enamel pin in the 25–35 mm range, an 80 × 120 mm or 90 × 140 mm card usually gives enough branding area without wasting board. For double-pin sets or pin-and-chain designs, larger formats reduce crowding and improve insertion stability.
Specify the board and print stack-up in the RFQ. A typical commercial spec is 300–350 gsm coated paperboard for standard programs, 350–400 gsm for retail or premium programs, and 400 gsm or higher for heavier pins or collector sets. Use SBS, C1S, or C2S terminology consistently and identify whether the card is coated on one side or both. For most buyers, 350 gsm C1S with matte lamination is the best balance of rigidity, cost, and print clarity.
Lock the tolerances as well. A practical finished-size tolerance is ±1 mm, while hole or slot position should be held within ±0.5 mm of the approved dieline. For double-post pins, ask for post-center spacing to be controlled within ±0.3 mm relative to the sample, because even small variation can create visible skew or stress on the holes. If the card has a euro slot, specify slot width, length, and orientation rather than assuming a standard punch will match your fixture.
- Finished size: width × height in mm, with trim tolerance and corner style.
- Board: gsm, paper grade, and coating type (SBS, C1S, or C2S).
- Print: 4C offset, digital, or spot colors with Pantone references.
- Mounting: hole diameter or slot size, center point, and post spacing.
- Finish: matte lamination, gloss lamination, soft-touch, foil, spot UV, or no finish.
- Pack-out: mounted or loose supply, bagging requirement, and accessory count.
Q: Which card construction is best for your use case?
Choose construction based on where the product will be sold and how it will be handled. Retail cards need better stiffness, cleaner finishing, and accurate hang geometry. Event giveaways need cost control and speed. Corporate gifting usually needs stronger visual consistency because the card is part of the perceived gift value, not just a carrier.
| Use case | Recommended spec | Why it works | Trade-off |
|---|---|---|---|
| Retail hanging display | 350–400 gsm C1S or C2S, matte lamination, euro slot | Supports shelf handling and looks clean under store lighting | Higher print and die-cut cost |
| Event giveaway | 300–350 gsm coated board, no lamination or light aqueous varnish | Lowest cost and fastest production | More prone to scuffing and edge curl |
| Premium gift set | 400 gsm board, soft-touch lamination, foil or emboss | Higher perceived value and stronger presentation | Slower lead time and tighter color control |
| Collector mailer | 350 gsm board with protective sleeve or inner bag | Better unboxing and transit protection | Extra material and packing labor |
For heavier pins, rigidity matters more than decoration. A flat-backed enamel pin with a single post may hold well on 300 gsm board, but a large cast pin, spinner pin, or two-post pin can flex a thin card during insertion and tear around the mount point. Once the board fatigues, the product looks damaged even if the pin itself is perfect. That is why premium programs often move to 400 gsm and add lamination rather than relying on print alone.
Do not overdesign a small card. If the layout is crowded with multiple effects, the branding competes with the product. A cleaner approach is often stronger: one clear logo, one short line of copy, one hang feature, and enough blank space to make the pin stand out.
Q: How do you avoid artwork and die-cut mistakes?
Most backing card errors come from file-control mistakes, not printing defects. The three recurring problems are insufficient bleed, incorrect mount position, and overpacked artwork. Set bleed at 3 mm on all sides, keep critical text at least 2.5 mm inside the trim line, and avoid placing important copy under the pin body unless you have already approved a mounted proof. If the card will hang on a retail peg, confirm the euro-slot dimensions and orientation before final sign-off.
The die line must be based on the finished edge, not a guessed artwork box. Ask the supplier for a marked template that shows trim, bleed, safe area, hole or slot position, and center marks for the pin posts. For irregular shapes, offset pins, chains, or clasped accessories, request a physical pre-production sample or at minimum a photo of the actual mounted assembly. That prevents expensive reprint, repack, and launch delays.
- Request a dieline with trim line, bleed line, safe area, and mount points.
- Approve a printed sample with the actual pin mounted on the actual stock.
- Confirm that text, barcode, foil, and logos clear the pin body and posts.
- Verify slot orientation if the card is meant for peg hooks.
- Check flatness after insertion and reject any bowing around the hole.
If the card includes regulatory text, a barcode, or retail SKU information, treat those items as critical artwork. Barcode quiet zones must remain clear, and the scan area should not be compromised by varnish build-up, foil, or a post pushing through the board. In practice, that means locking the layout before production rather than trying to correct it during packing.
Q: What print and finish choices are worth paying for?
Offset printing is the right default for medium and larger runs because it gives stronger solid fills, better fine-line reproduction, and more consistent batch-to-batch color than budget digital print. Digital printing is suitable for low volumes, test runs, and personalized cards, but it can look flatter on heavy coated board and may vary more between lots. For brand-critical colors, request a hard proof or an approved master sample and compare against it under daylight or D50 lighting.
Finish choice changes both appearance and durability. Matte lamination is the most forgiving option for most backing cards because it reduces glare, resists fingerprints, and improves rub resistance during packing and shipping. Gloss lamination can make colors appear brighter, but it also shows scratches more easily under store lighting. Soft-touch lamination creates a premium tactile feel, though it costs more and can mark if cartons are tightly packed or stored under pressure for long periods.
Decorative effects should be used selectively. Foil, embossing, and spot UV work best when the design has enough open space to support them. On a small card, too many finishes can reduce legibility and distract from the pin. A useful rule is to add premium effects only if they reinforce the selling story, such as a collector edition, luxury gift set, or limited-run retail drop.
If color accuracy is important, specify the print standard as clearly as the material. Buyers often ask for “good match” when they should ask for Pantone references, target delta, and proof acceptance criteria. A practical commercial target is to keep major brand colors within a visually acceptable match to the approved sample, with no obvious shift in the final mounted pack.
Q: What MOQ, cost, and lead time should you expect?
Backing cards are inexpensive relative to the pin, but cost still moves with setup complexity. Simple cards with straight cuts and no finish can start at lower MOQs because the job is mostly print and punch. Once you add foil, soft-touch, multiple versions, or custom shapes, MOQ rises because setup waste increases and the factory needs more units to amortize tooling and press setup.
| Spec level | Typical MOQ | FOB price range per card | Typical lead time |
|---|---|---|---|
| Simple printed card, no lamination | 500–1,000 pcs | USD 0.04–0.10 | 7–12 days |
| Coated card with matte lamination | 1,000–3,000 pcs | USD 0.08–0.18 | 10–15 days |
| Foil, emboss, or soft-touch finish | 3,000–5,000 pcs | USD 0.15–0.35 | 12–18 days |
| Custom shape or multi-version set | 5,000 pcs+ | USD 0.20–0.45 | 15–25 days |
These ranges assume normal commercial production and FOB factory pricing, not express sample service. If the order is supplied as a fully assembled pin-and-card set, add time for mounting and final QC. The lead time also depends on whether the card is printed in the same plant as the pin or sourced separately. Separate sourcing can be cheaper in theory, but it often adds coordination risk and one more approval step.
For buyers comparing quotes, the lowest unit price is not always the best result. A card that costs two cents less but misses the launch date, curls in transit, or requires repacking is more expensive in total landed cost. The more accurate comparison is total program cost, including scrap allowance, assembly labor, and the cost of any delayed shipment.
Q: What QC checks should be in place before shipment?
Inspect the backing card on three levels: print accuracy, physical fit, and pack-out consistency. Print accuracy covers color, trimming, text clarity, and alignment against the approved sample. Physical fit covers the pin’s centered position, tear resistance around the mount point, and whether the closure or post leaves an unintended mark on the front. Pack-out consistency covers card orientation, accessory count, and whether every set is mounted the same way.
A practical AQL target for mixed pin-and-card packs is often 2.5 for major defects and 4.0 for minor defects. Premium retail programs should be tighter. Major defects include wrong artwork, missing or mispunched holes, torn mount points, wrong size, unreadable barcode placement, and missing components. Minor defects include slight print drift, small scuffs, light lamination marks, and edge dust that does not affect saleability. The acceptance criteria should be written into the PO so the factory knows which defects are rejectable before packing starts.
- Check at least 10 pieces per carton for hole alignment and mount stability.
- Measure finished size with a caliper or ruler, not by eye.
- Inspect for curl or warp, especially on heavy ink coverage or lamination.
- Verify barcode readability if the card will scan at retail.
- Reject any pack where the post is visible in an unintended way.
If the program is high-visibility retail, consider adding a brightness, gloss, or rub-resistance check to the incoming sample review. Those are not always formal laboratory tests, but they help catch the kinds of cosmetic issues that become obvious on shelf. The goal is not perfect laboratory output; it is repeatable saleable output across the entire run.
Q: What should you do next?
Ask the factory for three things before mass production: a dieline, one printed blank, and one fully mounted pre-production sample. Review the mounted sample under the actual lighting and fixture conditions the product will face in market, then compare the first bulk cartons against that approved reference. Small issues such as card curl, slot drift, and surface scuffing often show up only after packing begins.
The most efficient sourcing structure is to list the backing card as a separate RFQ line with its own size, board grade, finish, mount geometry, and pack-out instructions. That keeps quotes comparable and prevents silent substitutions. For repeat orders, lock the card spec exactly the same way you lock the pin spec so replenishment batches stay visually consistent.
For new launches, build the card spec at the same time as the pin spec rather than waiting until the artwork is finished. That shortens approval cycles and reduces the chance that the pin is approved while the card is still vague. In practice, the best results come from one integrated approval package: pin, card, mount sample, and carton pack-out photo all signed off together.
Have a project? Send your artwork and target quantity and we’ll reply with a detailed quotation within 12 working hours.
Ready to get this made?
Send your sketch, target quantity and ship-date. Detailed quotation in 12 hours.


