How to Read a Custom Pin Spec Sheet Line by Line
Why spec sheets fail buyers
Most pin disputes start before production, not after it. The buyer and the factory often read the same line item differently, especially when the sheet says “hard enamel,” “gold finish,” or “1.2 mm thickness” without defining alloy, plating method, color tolerance, or backing strength. In custom metal products, ambiguity is expensive because the factory will fill gaps with its own defaults, and those defaults may be fine for one client but wrong for yours.
A good spec sheet does not sound technical for its own sake. It removes decisions from the factory, one line at a time, so the quote, sample, and mass production all point to the same build. That matters for enamel pins, brooches, keychains, badges, coins, magnets, and lanyard charms, where small changes in thickness, line width, or plating can alter cost, feel, and defect rate. The goal is to make every line measurable, inspectable, and tied to an outcome.
In practice, the strongest sheets combine artwork references with production limits. A factory can usually work from a vector file and a photo, but it needs a written build spec to avoid assumptions about alloy, fill height, attachment style, packaging, and acceptable variation. If the sheet cannot answer those questions, the quote may still look right while the actual product does not.
Base metal and thickness
The base metal line defines how the product stamps, casts, polishes, and survives handling. Brass usually gives the sharpest stamped detail and the cleanest edges, which is why it is common for premium pins and badge work; iron is lower cost and widely used for budget promotional runs; zinc alloy is better for 3D relief, thicker bodies, and designs that need casting rather than stamping. If the design uses deep recesses, heavy relief, or undercuts, zinc alloy is often the safer choice. If it uses crisp text, fine outlines, or high-contrast enamel separations, brass is usually the better call.
Thickness should never be left as “standard.” For flat lapel pins, 1.0 mm to 1.2 mm is a lean promotional build, 1.2 mm to 1.5 mm is a common commercial range, and 1.5 mm to 2.0 mm is better when the design is larger, has cutouts, or needs a more substantial feel. For challenge coins, 2.5 mm is a practical minimum for light-duty pieces, while 3.0 mm to 5.0 mm is more common for premium coins and relief work. A tolerance of ±0.10 mm to ±0.20 mm is realistic on many metal parts depending on process and size; if the supplier cannot state a tolerance, the thickness line is not complete.
Write the line so it cannot be misunderstood. A better RFQ entry is: “Brass, stamped, 1.2 mm finished thickness ±0.1 mm, polished edges.” If the piece is plated after polishing, ask whether the tolerance applies before or after plating. For zinc alloy castings, specify whether the quoted thickness refers to the thinnest section, the average body, or the finished face, because those are not interchangeable on a 3D part.
| Item | Typical range | Buyer note |
|---|---|---|
| Flat lapel pin thickness | 1.0-2.0 mm | Use 1.2-1.5 mm for most standard pins |
| Challenge coin thickness | 2.5-5.0 mm | Go thicker for deeper relief and edge text |
| Finished thickness tolerance | ±0.10-0.20 mm | Require the supplier to state the measurement point |
| Minimum line width | 0.20-0.30 mm | Below 0.25 mm becomes risky for stamping |
Plating line by line
Plating is not just a color choice; it affects appearance, wear, corrosion resistance, and perceived quality. Common decorative finishes include shiny gold, shiny nickel, matte nickel, black nickel, antique brass, antique copper, and blackened or brushed variants. For buyer specs, the finish should name the tone, surface character, and if possible the target deposit range in microns. Decorative nickel or gold layers in pin work are often very thin, commonly around 0.03 to 0.08 microns for appearance-focused plating over a base coat, while more durable builds may use thicker underlayers, a clear coat, or a different substrate strategy depending on the use case.
The practical issue is consistency, not just the nominal number. A gold tone can vary from warm yellow to pale champagne depending on bath chemistry, polishing level, and batch control. Black nickel can look nearly gunmetal or almost charcoal depending on depth and reflectivity. If the product will be worn daily, handled in retail, or shipped through humid climates, the spec should state whether tarnish resistance is required, whether a clear coat is allowed, and whether the finish must match a prior sample or a brand standard. For indoor commemorative pins, an antique finish may be acceptable; for uniform or fashion applications, buyers usually need a brighter and more repeatable tone.
Be specific about the match target. If a brand already has an approved reference, write “match sample A within one shade step under D65 lighting” or give a Pantone target for the enamel and a named plating finish for the metal. Do not ask for “gold” alone. Ask for “shiny gold, bright mirror polish, no green cast, match approved sample.” That language is clear enough for both quoting and final inspection.
| Finish line item | What to specify | When to avoid it |
|---|---|---|
| Shiny gold | Tone, gloss level, match target, any clear coat | When the brand wants low-glare or aged styling |
| Nickel | Bright or matte, corrosion expectation, polish level | When the product needs a warmer premium tone |
| Black nickel | Depth of black tone, reflectivity, contrast with enamel | When artwork relies on a very light metal background |
| Antique brass | Darkness level, brushed vs aged look, surface uniformity | When the client expects a modern mirror finish |
Color system and fill depth
Color calls are only reliable when they reference a real color system and a fill rule. Pantone is still the most practical choice for international custom pin work, but the spec should state whether the factory is matching to coated or uncoated references and what delta is acceptable. If a brand tolerates only a narrow shade window, say so. If slight batch variation is acceptable, define that too. Without that line, the sample can pass under one light source and fail under another.
The finish type changes the look and the production risk. Soft enamel leaves recessed areas lower than the raised metal lines, so the tactile contrast is part of the design; hard enamel is usually polished flush or nearly flush, which creates a smoother face and tighter visual alignment. If the design uses translucent, glitter, glow-in-the-dark, or layered enamel, those effects should be called out separately because they change depth, opacity, and color consistency. For standard buyer specs, it helps to define fill height in practical terms: recessed by roughly 0.2 mm to 0.4 mm for soft enamel, or flush within about 0.05 mm to 0.10 mm for hard enamel after polishing, depending on the design and factory process.
Concrete color language prevents avoidable rework. A strong line item reads: “Pantone 186 C red, soft enamel, no more than one shade variation from approved sample, recessed fill 0.3 mm nominal.” If the piece includes white, black, or transparent areas, note them separately, because those colors often behave differently in curing and polishing. For designs with multiple small color fields, ask the factory to confirm minimum color wall width and whether any areas will be widened for manufacturability.
- State the exact color reference, not just color names.
- Specify soft enamel or hard enamel, then note whether epoxy is allowed.
- Declare if minor shade shift is acceptable between sample and bulk.
- Require a fill-height expectation for recessed vs flush areas.
- Call out special effects separately from base colors and metallic inks.
Line width, cutouts, and edge control
Artwork that looks clean on screen can fail once it becomes metal. Tiny text, hairline borders, and narrow gaps are the first things a factory will simplify if the mold or die cannot hold them cleanly. A useful spec sheet should define minimum line width, minimum gap, and whether the design contains openwork cutouts, bridges, islands, or floating elements that need reinforcement. This is especially important for pins, badges, coins, and charms where the silhouette and line integrity carry the design.
A practical line-width target for many metal products is 0.20 mm to 0.30 mm as a risk zone, not a guarantee. Designs with lines below 0.25 mm, gaps below 0.25 mm, or tiny internal text below about 2.0 mm high often need artwork revision before tooling. If the piece must survive daily handling, pocket wear, or repeated clasping, ask the factory to confirm the smallest manufacturable detail in writing and to flag any simplification before sampling. It is cheaper to thicken a border in prepress than to discover that a quote-friendly design cannot be stamped cleanly.
Edge control also matters. A clean outside edge, no burrs, and smooth cutout transitions should be stated as acceptance criteria if the product is meant for retail, premium gifts, or uniform use. For multi-layer pins or cutout logos, specify whether the edge should be polished, sandblasted, or left with a defined texture, because the surface treatment changes how the artwork reads. If the design uses raised text, add a minimum height target, usually 1.0 mm or more for readable results on small metal items.
A helpful rule is to lock the smallest feature first. If the supplier says a 0.20 mm line will not hold on the chosen process, accept a wider line before approving art. The same logic applies to internal negative space, especially in letters like A, R, P, and O, where tiny bridges can collapse or fill during plating and polishing.
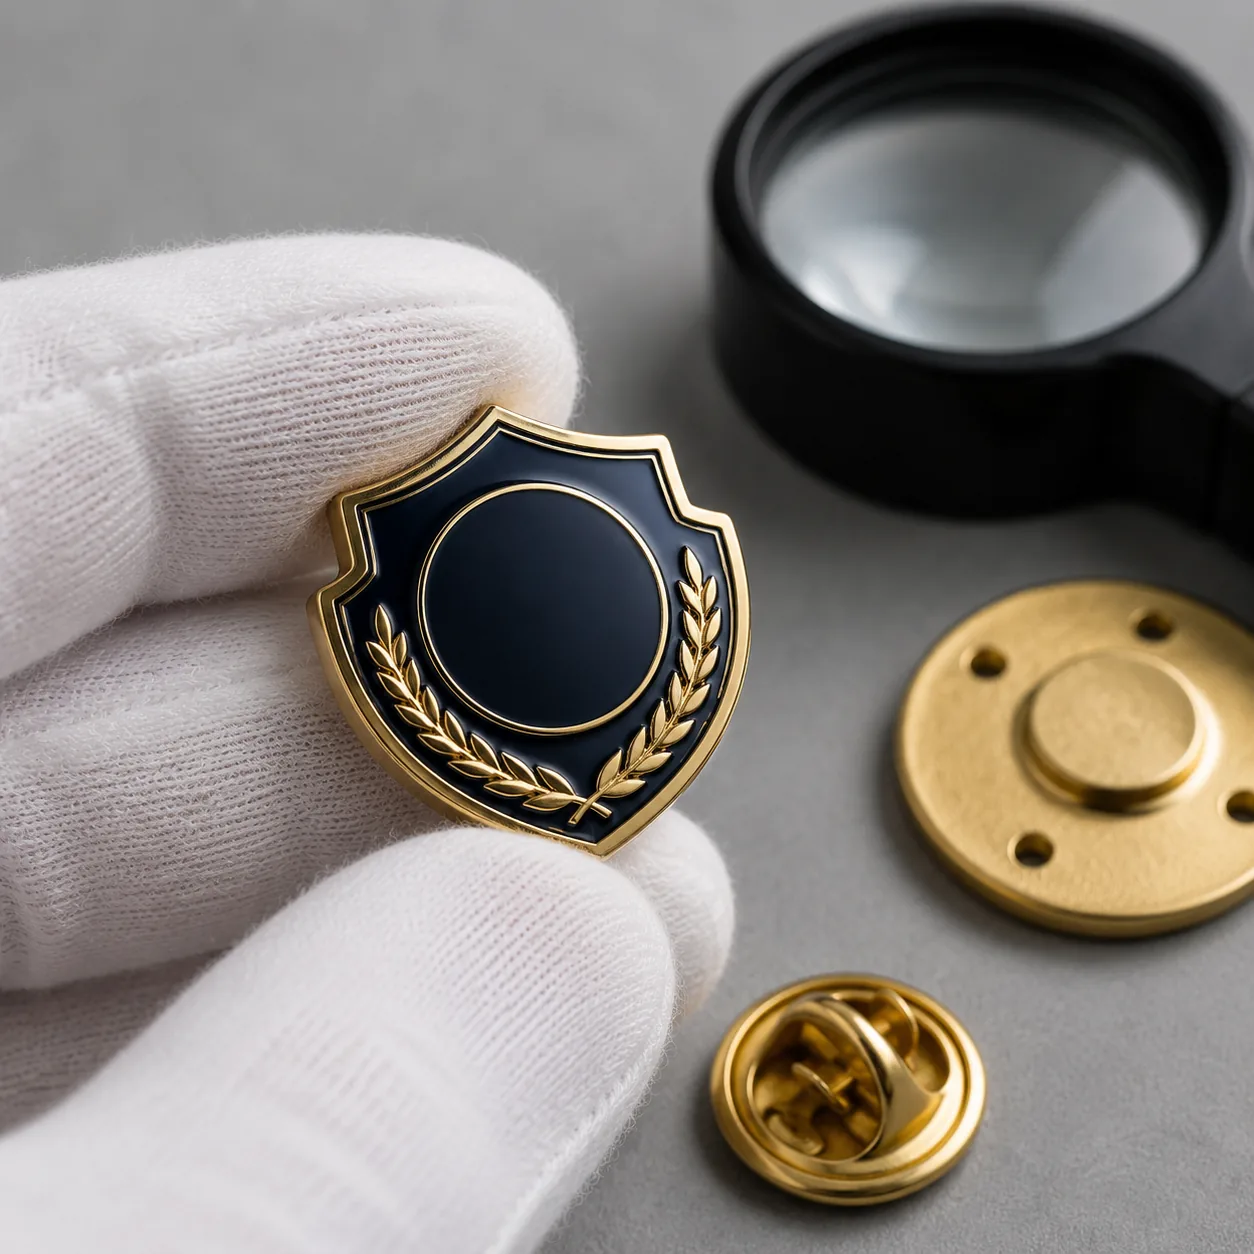
Backings, attachments, and wear points
Hardware is where many returns begin because the front face looks right but the product fails in use. The spec should define the attachment type, material, and intended wear environment. A light 20 mm pin may do fine with a rubber clutch, but a heavier 25 mm to 35 mm enamel pin often needs a butterfly clutch, deluxe locking clutch, or double pin post to prevent rotation. If the product will be worn on jackets, bags, uniforms, or soft textiles, say so; each use case changes the pull requirement and the wear pattern.
For other custom metal goods, the same rule applies. Keychains should state ring diameter, wire gauge, split-ring style, and whether a swivel is required. Lanyards should define clip width, swivel or no swivel, and finish. Magnets should specify magnet type, pad thickness, and whether a foam pad or protective film is needed to avoid surface scratching. If a part rotates, rattles, or loosens under use, the item can feel cheap even if the front metalwork is excellent.
For pins, the post and clutch combination should match weight and use. As a practical guide, single-post pieces under about 10 g can often use a standard butterfly clutch, while heavier or taller pieces may need two posts, locking clutches, or rubber stops. For hard-use uniforms, ask for pull testing or at least a written attachment recommendation. If the product is large enough to spin, specify anti-rotation hardware or a second post so the front does not twist on fabric.
| Hardware line | Buyer should specify | Typical risk if omitted |
|---|---|---|
| Pin clutch | Type, material, pull resistance expectation | Loss during wear or fabric damage |
| Keychain ring | Diameter, wire gauge, finish | Opening under load or poor durability |
| Lanyard clip | Metal type, swivel need, opening width | Twisting, scratching, or weak grip |
| Magnet backing | Magnet grade, pad thickness, coating | Rotation, slipping, or surface damage |
Tolerances, QC, and inspection language
Tolerances turn a spec sheet into a production contract. If the buyer does not state acceptable variation, the factory will use its internal limits, which may not match brand expectations. For custom metal products, dimensions, hole position, enamel registration, attachment placement, and plating coverage should all be treated as measurable. A clear spec sheet reduces disputes because it replaces “looks off” with a defined deviation.
For inspection language, name both the method and the acceptance level. Many import buyers use AQL 2.5 for major defects and AQL 4.0 for minor defects as a practical reference, but the defect definitions matter more than the numbers. Missing enamel, bare metal where plating should cover, cracked epoxy, wrong backing, loose hardware, and warped bodies should be defined as major defects. Minor defects might include slight surface scratches, very small color mismatch, or packaging scuffs, depending on the brand standard. If the product is for retail or a campaign launch, ask for a first-article approval, in-process inspection, and final carton check.
It helps to write the QC line in plain language: “Inspect against approved sample, AQL 2.5 major / 4.0 minor, with 100% check on backing attachment and color placement.” That is more useful than a generic “QC required” note. If the product will be sold through distributors, add packaging and label verification so the shipment is not rejected for a preventable admin error. For critical dimensions, require the factory to record sampling results rather than just state pass/fail.
Define tolerances where buyers usually forget them: overall width and height, enamel registration, post position, and plating coverage on the edge. A realistic tolerance for small pins is often ±0.2 mm on overall size, with looser allowance on decorative irregular edges. For complex die-cuts or layered relief, it is better to specify the functional limit, such as “no visible metal gap between color fields under 30 cm inspection distance,” than to pretend every decorative detail can be measured the same way.
Commercial terms that change the spec
A spec sheet is incomplete if it ignores commercial choices that affect production behavior. MOQ tiers matter because very small runs often use different batching, fewer plating options, or simpler packaging. For many custom pins, a common MOQ is 100 to 300 pieces for one design with limited finish options, 500 pieces for more standard pricing, and 1,000 pieces or more when the buyer wants better unit cost and broader custom options. Complex multi-layer or 3D zinc alloy work may require higher minimums or separate tooling assumptions.
Lead time matters for quality, not just logistics. A normal timeline after sample approval is often 12 to 20 days for straightforward metal pins, badges, or keychains, while more complex plating, multi-color fills, or mixed hardware can push the schedule toward 20 to 30 days. Rush orders compress polishing, curing, and inspection windows, which raises the risk of plating inconsistency and hardware failure. If timing is tight, the spec should explicitly authorize or reject substitutions so the supplier cannot swap materials to save days.
FOB pricing should be read with the build behind it. A simple iron soft enamel pin might land around USD 0.35 to 1.20 FOB depending on size and quantity, while a brass hard enamel pin with polished finish and individual polybagging can often sit around USD 0.80 to 2.50 FOB or higher. Coins, keychains, and layered badge products can move outside those ranges quickly based on thickness, plating, and accessory choice. The quote is only meaningful if the spec also states quantity tier, packaging state, and inspection level, otherwise two suppliers may be pricing different products under the same name.
Ask for tiered pricing in writing so you can compare real breakpoints. For example, a supplier might quote 100 pcs at USD 1.45 FOB, 300 pcs at USD 0.98 FOB, and 1,000 pcs at USD 0.72 FOB for the same pin. That spread is normal because tooling amortization, plating setup, and packing labor are spread over volume. If the supplier will not show quantity tiers, the quote is incomplete.
What to do next
Start by marking every line on your current spec sheet as measurable, visual, or missing. If a line cannot be checked with a ruler, color reference, sample, or inspection note, it is probably too vague to protect you in production. Then tighten the document around the three highest-risk areas for your item: structure, finish, and hardware. For pins and badges, that usually means base metal, thickness, plating, color fill, and backing; for coins, thickness, relief, and edge detail; for keychains and lanyards, attachment hardware and wear points.
Before sending an RFQ, make the request concrete: one clean drawing, one reference photo, one quantity tier, and one line-by-line spec list. Ask each supplier to restate the build in their own words before sampling. That step exposes who actually understood the product and who only priced the artwork. It also gives you a cleaner basis for comparing factories on custom enamel pins, brooches, keychains, magnets, challenge coins, patches, and lanyards, where the fastest way to reduce rework is to remove ambiguity before tooling starts.
Use a simple rule for the final review: if a line item affects fit, finish, color, wear, or cost, it belongs on the sheet. If it is only a preference, keep it in the notes. That keeps the document short enough to use, but detailed enough to control the result.
Have a project? Send your artwork and target quantity and we’ll reply with a detailed quotation within 12 working hours.
Ready to get this made?
Send your sketch, target quantity and ship-date. Detailed quotation in 12 hours.


