First Import Custom Pins: A 7-Decision Framework for 2026
Most failed first-time pin imports go wrong before stamping, die-casting, coloring, or plating begins. The root cause is usually not factory capacity; it is decision order. Buyers approve artwork before defining use case, request quotations before locking size and attachment, or compare offers built on different assumptions for plating thickness, packaging, sample route, and inspection standard. The result is predictable: proof revisions, tooling changes, delayed approvals, and unit costs that rise after the quote was supposedly accepted.
A better method is to make seven decisions in sequence, with each decision removing one common source of rework. For 2026 programs—trade-show giveaways, employee-service awards, museum retail, influencer merch, fan-club drops, or e-commerce collector launches—the objective is not just speed. It is a complete manufacturing specification that can move from proofing to sampling to mass production without being reopened three times. When the sequence is correct, factories quote against the same scope, sampling is faster, and inspection becomes measurable instead of subjective.
1. Define end use before selecting material, finish, or packaging
Start with how the pin will be worn, how long it must stay presentable, and what level of perceived value the audience expects. A one-day conference giveaway pinned to a tote bag needs a different build from a 5-year service award, a museum store SKU, or a limited collector release sold at USD 12-25 retail. If end use stays vague, buyers often overspend on cosmetic upgrades or underspec structural details, then discover bent posts, rotating pins, plating rub, or return complaints after distribution.
For short-life promotional use, a practical baseline is stamped iron or die-cast zinc alloy, 25-35 mm width, 1.2-1.5 mm body thickness, soft enamel, bright nickel or black nickel plating, and one butterfly clutch for compact shapes. At 300 pieces, typical FOB pricing is around USD 0.45-0.85 each, with one-time tooling of about USD 45-90 for a standard outline with no internal cutouts. At 500 pieces, the same spec often falls to roughly USD 0.35-0.68 FOB because setup and handling are spread over more units.
For higher perceived value, many buyers move to die-struck brass or iron with imitation hard enamel, 1.5-2.0 mm thickness, polished face, and two posts. That usually puts FOB around USD 0.70-1.40 at 300 pieces and USD 0.55-1.05 at 500 pieces, depending on plating, backing, and pack-out. If the design will be handled frequently, an epoxy dome can improve abrasion resistance on printed or soft-enamel surfaces, but it also rounds edge definition and usually adds 2-4 working days.
- Confirm wear location: lapel, cap, backpack, lanyard, tote, card insert, or retail display
- Define service life: one event, one season, or multi-year collectible
- Name the main failure risk: scratching, post breakage, tarnish, color mismatch, rotation, or late delivery
- Set quality tier early: giveaway-grade, corporate program, retail-ready, or collector grade
2. Match the manufacturing process to the artwork geometry
Many first-time buyers ask for hard enamel because it sounds premium or soft enamel because it sounds cheaper. That is the wrong starting point. Artwork geometry determines the viable process: metal line width, recessed fill area, text size, relief depth, number of cutouts, color separation, and whether the art depends on gradients or photographic detail. A process that looks excellent on a bold logo can fail on fine serif text or portrait-style illustration.
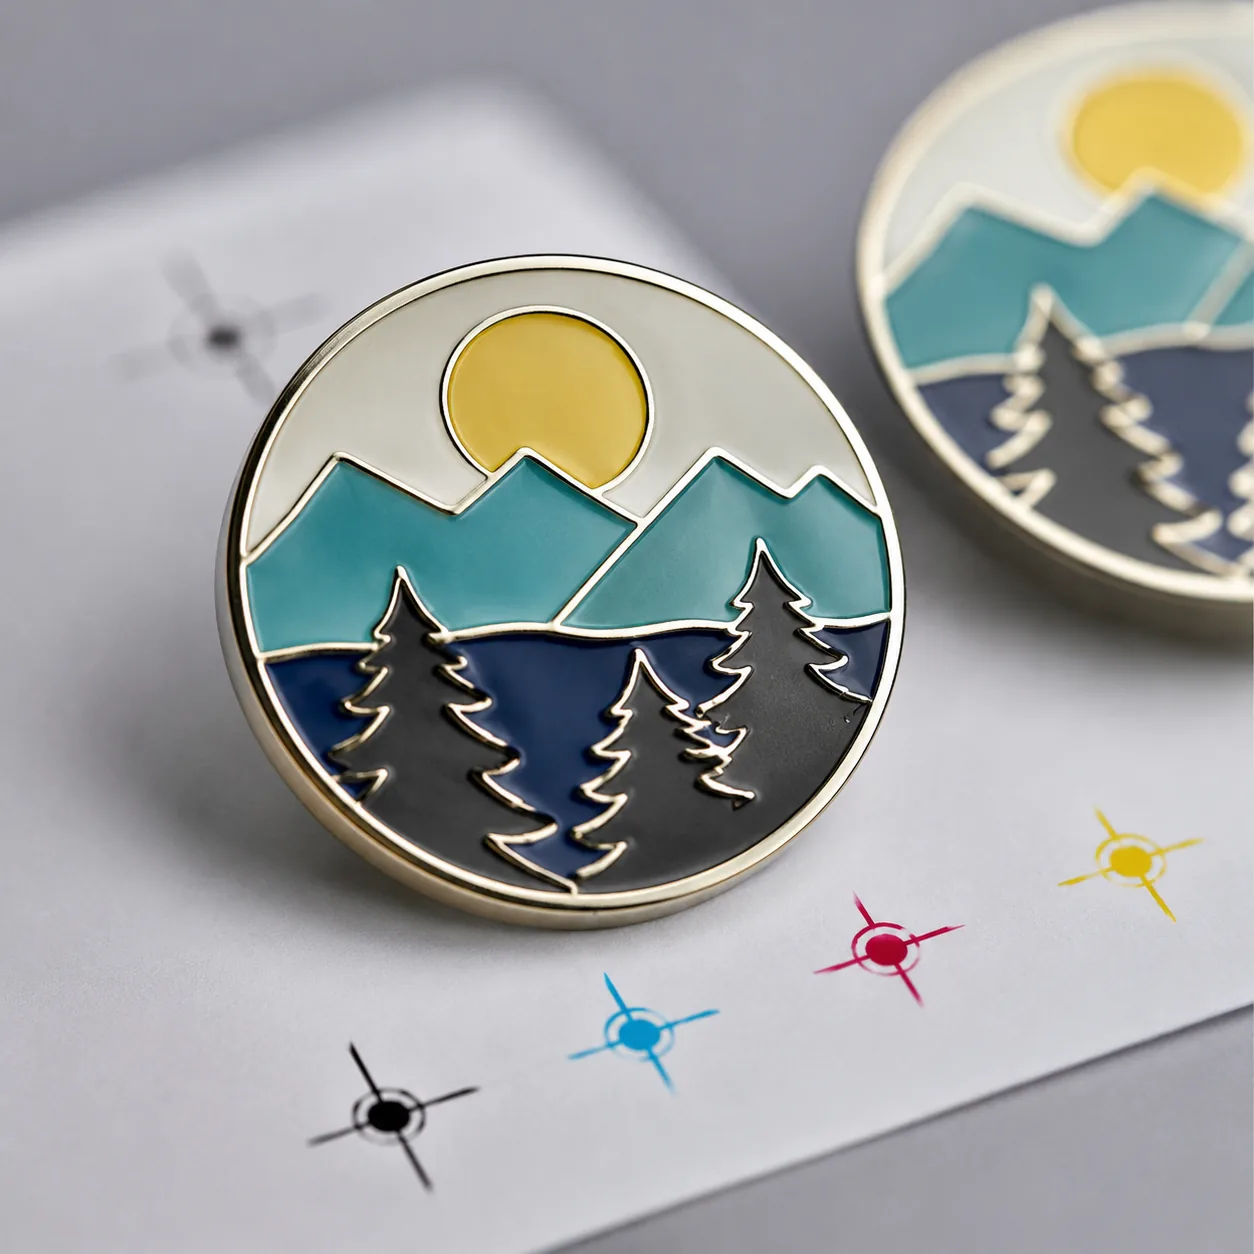
Soft enamel is usually the safest first choice for event marks, mascots, sports pins, and logos with clear metal outlines. It handles blocked colors well, keeps visible depth, and performs reliably at about 20-50 mm. Imitation hard enamel is better when the face needs to feel flatter and more jewelry-like, but it is less forgiving when very small color cells sit between narrow raised lines because polishing can expose edges or wash out fine detail. Printed pins with epoxy are generally the better option for gradients, facial detail, skin tones, halftones, or text so fine that metal borders would close it up.
| Decision factor | Soft enamel | Imitation hard enamel | Printed with epoxy |
|---|---|---|---|
| Best fit | Bold logos, event pins, mascots, layered color blocks | Premium corporate pins, cleaner flat face, giftable programs | Gradients, tiny text, photo-like art, complex illustrations |
| Typical thickness | 1.2-1.8 mm | 1.5-2.0 mm | 1.0-1.5 mm metal base plus print |
| Minimum practical raised metal line | 0.25-0.30 mm | 0.30 mm preferred | Not metal-line dependent |
| Minimum practical recessed color area | 0.35 mm | 0.40 mm preferred | Not applicable |
| Readable small text guideline | About 5 pt equivalent, bold sans serif | About 5.5 pt equivalent, simple font | Down to about 3.5-4 pt if print resolution and contrast allow |
| Typical MOQ | 100 pcs standard, better pricing at 300+ | 100 pcs standard, better pricing at 300+ | 100 pcs standard, better pricing at 300+ |
| FOB at 300 pcs | USD 0.45-0.95 | USD 0.60-1.20 | USD 0.50-1.00 |
| Lead time after proof approval | 12-18 working days | 14-20 working days | 10-16 working days |
| Main limitation | Recessed fills can trap dirt and show underfill | Higher polish sensitivity and more rework risk on fine detail | Less metallic definition at close range |
As a practical art rule, keep raised metal lines at or above 0.25 mm, recessed fill areas at or above 0.35 mm, and avoid isolated micro-islands that cannot hold enamel consistently. For die-struck details, line breaks below 0.20 mm become risky, especially on small pins under 25 mm. If text matters, use bold sans-serif lettering and keep counters open. If the design includes gradients, transparency effects, or portrait detail, move to printed construction immediately rather than wasting a proof cycle trying to force enamel to do what it cannot.
3. Set the landed-cost ceiling before approving upgrades
Most overruns come from stacked extras, not one dramatic error. Glitter fill, glow pigment, translucent enamel, dual plating, cutouts, custom backstamp, upgraded clutch, printed backing card, barcode label, OPP sleeve, and gift box may each look small on a quotation. In combination they can raise landed cost by 20-60 percent and add manual handling steps that extend production by several days.
Set the landed target per delivered unit first, then split it into product, packaging, freight, and duty allowance. On a 300-piece order, standard tooling is often USD 45-90, and the FOB pin itself may land between USD 0.55 and 1.10 before premium packaging. A printed backing card plus OPP sleeve usually adds about USD 0.08-0.20 per unit. A rigid gift box can add USD 0.35-0.90 per unit, plus higher dimensional shipping cost. Locking backs commonly add USD 0.12-0.35 per set versus standard butterfly clutches.
MOQ tiers matter. Below 200 pieces, setup, labor, and packing overhead push unit cost up sharply. At 100 pieces, a pin quoted at USD 0.55 FOB at 500 pieces may move to roughly USD 0.95-1.45 before extras. In that situation, it is usually better to remove presentation add-ons than to weaken core construction. Reducing a pin from two posts to one when the shape needs anti-rotation stability, or thinning the body from 1.5 mm to 1.0 mm to hit a target, often creates more downstream cost than deleting a sleeve or premium insert.
Use a simple spending hierarchy: structure first, finish second, presentation third. Spend budget on correct thickness, attachment, and plating specification before paying for packaging that does nothing to reduce defects or returns.
4. Convert the artwork into a production-ready specification sheet
Artwork approval by itself is not a manufacturing instruction. A vector file shows shape and color intent, but it does not control production unless it is translated into one proof sheet with measurable specifications. Before tooling release, lock final size in millimeters, body thickness, material, process, plating, Pantone references, attachment type and position, backside finish or backstamp, packaging method, inner pack quantity, and any barcode or card orientation requirement.
For custom pins, tolerances should be explicit. Finished size tolerance is commonly +/-0.2 mm. Thickness tolerance is usually +/-0.1 mm. Attachment position is often controlled to about +/-0.5 to 1.0 mm depending on jig accuracy and pin size. Burr-free edges should be required for wearable items, especially school, staff, retail, and children-adjacent programs. If posts are welded, specify pull resistance expectations or at minimum require firm manual test with no looseness, because weak post welds are a common hidden defect.
Plating notes also need to be specific. Electroplated nickel, black nickel, gold-tone, antique brass, and antique copper can vary slightly by chemistry batch, racking, and polishing sequence. If appearance consistency matters, approve a visual standard sample and define the finish as bright, matte, or antique. For many factories, decorative plating thickness on pins is thin compared with engineered parts, often around 0.03-0.10 micron for top decorative layers. That is normal for fashion accessories, but buyers should not assume heavy wear resistance from decorative plating alone.
Color notes should be realistic. Pantone callouts are useful, but enamel on metal will not match a coated swatch exactly, especially in small cells or on textured surfaces. Better wording is 'Pantone 186 C, match as close as commercially feasible' and then identify which one or two colors are brand-critical. If exact visual alignment matters, request a marked proof that prioritizes those colors rather than writing 'must match exactly,' which is usually unenforceable in metal-and-enamel production.
The best approval page places dimensions, color callouts, post placement, backside detail, card layout, insertion orientation, barcode position, and carton assumptions on one sheet. That avoids the common delay where the pin is approved but the backing card, barcode label, or insertion direction is still undecided when the order reaches final packing.
5. Treat attachment hardware as a functional and safety specification
Attachment hardware is inexpensive relative to the whole project, but it is one of the highest-risk items to ignore. Many buyers default to a butterfly clutch because it is standard. Standard is not the same as suitable. Hardware should be selected from pin width, weight, center of gravity, fabric type, and whether rotation or loss creates a quality problem.
As a rule of thumb, one post is often acceptable for pins under 25 mm and under about 5 g if orientation is not critical. For 30-45 mm pins, wide horizontal shapes, or asymmetric outlines, two posts usually reduce rotation and improve perceived quality. For thicker pins, layered constructions, spinner elements, or weights above roughly 8-12 g, standard butterfly backs should be reviewed carefully because they can feel unstable or loosen after repeated handling.
Butterfly clutches are economical and common, but they can deform with repeated use. Rubber clutches are gentler on delicate fabrics and reduce scratching when many pins are packed together. Deluxe locking backs are better for staff uniforms, schoolwear, museum resale, and higher-value wearables where loss matters, though they increase piece cost and assembly time. Post placement matters as much as hardware type: if posts sit too close to an edge, on a narrow arm, or off the weight centerline, the pin will rotate or stress the weld even if the plating and face look fine.
- Under 25 mm and under about 5 g: 1 post can be acceptable
- 30-45 mm, horizontal, or asymmetric shapes: use 2 posts to reduce rotation
- Above 8-12 g, layered builds, or moving parts: review stronger hardware or locking backs
- Delicate garments, gift sets, or bulk packed units: consider rubber clutches to reduce snagging and scratches
6. Choose the correct sample route and define inspection before production
Not every first order needs a physical pre-production sample, but many importers choose the wrong approval path. Skipping a sample on a basic logo pin can save time. Skipping it on a complex design with dual plating, tiny text, moving parts, or custom retail packaging can create expensive rework. The correct route depends on geometry, finish complexity, packaging integration, and the cost of being wrong once bulk production starts.
For a straightforward 30 mm soft enamel logo pin with standard bright nickel plating and a simple card, a digital proof plus retained factory reference sample may be enough. For designs with dual plating, spinners, danglers, fine typography, printed gradients, epoxy domes, or custom gift packaging, a physical pre-production sample is usually worth the extra 5-10 working days plus courier cost. Typical timing is 1-3 working days for digital proofing, 3-5 days for tooling, 5-10 days for physical sampling, and 12-20 working days for mass production after final approval. Epoxy curing, card insertion, barcode labeling, or gift boxing can add another 2-5 working days.
Inspection standards should be fixed before production, not argued after defects appear. A practical starting point is ANSI/ASQ Z1.4, General Inspection Level II, single sampling, with AQL 2.5 for major defects and AQL 4.0 for minor defects. For retail resale or collector programs, many buyers tighten to AQL 1.5 major and 2.5 minor. Major defects usually include wrong size outside tolerance, missing or weak attachment, sharp burrs, unreadable text, wrong plating, missing color fill, cracked epoxy, wrong item count, or incorrect card insertion. Minor defects often include light underfill visible at close range, tiny dust points under epoxy, slight plating tone variation within the approved reference, or small enamel overfill not visible at arm's length.
Ask the supplier to state lead time from final approval, not from inquiry date. '15 days production' often means factory processing time only and may exclude tooling, card printing, final assembly, booking, and transfer to forwarder. A working-day calendar tied to milestones prevents the common misunderstanding where the buyer expects ship-ready goods while the factory is still waiting on packaging completion.
7. Plan packaging and freight at the same time as the pin
Many first imports look acceptable at FOB level and then become expensive once freight is calculated. Pins are small, but presentation choices drive labor, carton count, and chargeable weight. A plain polybagged pin ships very differently from a pin mounted on a printed card in an OPP sleeve, or from a pin packed in a rigid box with foam.
Simple bulk or individual polybag packing keeps FOB low and minimizes hand assembly. Adding a custom card introduces insertion labor, orientation control, and bagging steps that often add 1-3 working days to finishing. Adding gift boxes, EVA foam, or barcode labels can expand carton volume much faster than the product itself. On low-quantity air shipments, dimensional weight often matters more than the metal pin cost that buyers spent most of their time negotiating.
As a planning reference, 500 standard polybagged pins may fit in one export carton around 35 x 25 x 20 cm with gross weight roughly 6-10 kg, depending on pin size, thickness, and whether clutches are pre-attached or packed separately. The same 500 units in small rigid boxes may require two to four cartons and materially higher chargeable weight. For conference distribution, every extra gram and cubic centimeter should be justified. For museum or retail programs, presentation may be worth it—but only if it supports the sell-through price and shelf experience.
Before placing the PO, confirm unit pack method, inner-pack quantity, master carton dimensions, net and gross weight, carton marks, and freight mode: courier, air cargo, or ocean consolidation. On modest orders with fixed delivery windows, these details can change landed cost more than a USD 0.05 movement in quoted FOB.
PO checklist: what to lock before releasing bulk production
Before requesting final quotation or issuing the PO, create a one-page decision brief covering end use, final size in mm, quantity tier, process, material, plating, attachment, packaging level, sample route, inspection standard, target ship date, and maximum landed cost. A supplier can quote quickly from incomplete information, but it can only quote accurately from a controlled specification.
- Classify the program: giveaway, employee award, retail merch, or collector release
- Choose the process from artwork geometry, not preference alone
- Set a landed-cost ceiling before approving decorative upgrades
- Approve one proof sheet covering size, colors, posts, backside, and packaging
- Decide whether a physical sample justifies 5-10 extra working days
- Define AQL, defect categories, carton pack, and freight assumptions before production
A successful first import is rarely the lowest quote on the spreadsheet. It is the order with the fewest unresolved assumptions. When end use, process, cost ceiling, spec sheet, attachment, sampling path, and packaging plan are locked in the right order, the result is usually uneventful in the best possible way: stable pricing, fewer proof loops, cleaner inspections, and fewer surprises after the goods leave the factory.
Have a project? Send your artwork and target quantity and we’ll reply with a detailed quotation within 12 working hours.
Ready to get this made?
Send your sketch, target quantity and ship-date. Detailed quotation in 12 hours.


