Failure Modes in Custom Metal Giveaways: Specs That Prevent Rework
Where Most Production Problems Start
The biggest mistake in custom metal giveaways is treating the drawing as complete when the product is still ambiguous. In factory terms, ambiguity turns into machine setup guesses, and guesses turn into rejects, delays, and quote disputes. Most failures are not random; they come from missing numbers on thickness, line width, plating, color boundaries, backing choice, or tolerance stack-up.
For buyers, the risk is not only cosmetic. A lapel pin can be visually acceptable and still fail because the post angle bends fabric, the clasp loosens in transit, or the finish tarnishes after a short storage period. If you want fewer surprises, spec the failure mode first, then the feature. ZheCraft sees better first-pass yield when the RFQ names the likely point of failure instead of just describing the artwork.
Failure Mode 1: Artwork That Cannot Be Built Cleanly
A common production failure is artwork that looks fine on screen but collapses in tooling. Tiny islands, hairline gaps, and dense text often disappear once the metal walls and enamel cells are cut at real scale. If the factory has to “interpret” the art, you have already created a quality risk, because different operators will make different judgment calls.
The prevention is to spec minimums that match the build method. For soft enamel pins, a practical minimum line width is 0.20 to 0.25 mm, with enclosed spaces no smaller than 0.30 mm. For raised relief coins and badges, keep fine letters at least 1.0 mm high if you want consistent legibility after polishing and plating.
- State the final size in millimeters, not just a vector file.
- Mark all text that must remain readable after reduction.
- Call out any must-keep gaps, holes, or cutouts explicitly.
- Ask the supplier to flag features below their minimum tooling limit before sampling.
Failure Mode 2: Plating That Looks Good on Day One and Fails Later
Plating failures usually begin with unrealistic expectations about wear, oxidation, and base preparation. A bright nickel or antique finish can look stable on sample day, then show dulling, fingerprints, or edge discoloration after bagging and storage. If the base metal is poorly cleaned or the plating thickness is too light, the finish will age unevenly and trigger disputes even when the artwork is correct.
For most promotional metal goods, a practical decorative plating range is about 0.05 to 0.10 microns of gold-tone color coat over a properly prepared substrate, while harder-wearing finishes may need a more controlled process and better sealing. If the product will be handled often, ask whether the factory is using a plated finish, an electroplated layer, or only a color spray effect, because those are not equivalent in durability. Nickel-free or low-nickel requirements should be stated early, not after sampling.
| Failure mode | What the buyer sees | Spec that reduces the risk |
|---|---|---|
| Thin or weak plating | Dull edges, early wear, patchy color | Ask for finish type, target thickness, and surface prep method |
| Poor cleaning before plating | Blisters, pitting, uneven sheen | Require pre-plate cleaning and sample approval under the same process |
| Mismatch between finish and use | Scratches or tarnish in storage | Match finish to handling level and storage duration |
Failure Mode 3: Enamel Fill Problems
Uneven enamel fill is usually a geometry problem, not a color problem. Deep cells trap air, shallow cells overfill, and narrow cavities bridge or shrink as they cure. Buyers often call this “bad color,” but the real issue is that the cell design could not retain a stable fill height across the whole run.
A workable rule is to control both wall height and fill depth. For most soft enamel products, a fill depth target around 0.8 to 1.2 mm is more stable than forcing a deep pocket that looks dramatic on renderings. If the design uses multiple adjacent colors, specify the enamel boundary tolerance and ask for a pre-production sample showing at least one area with the tightest cell geometry.
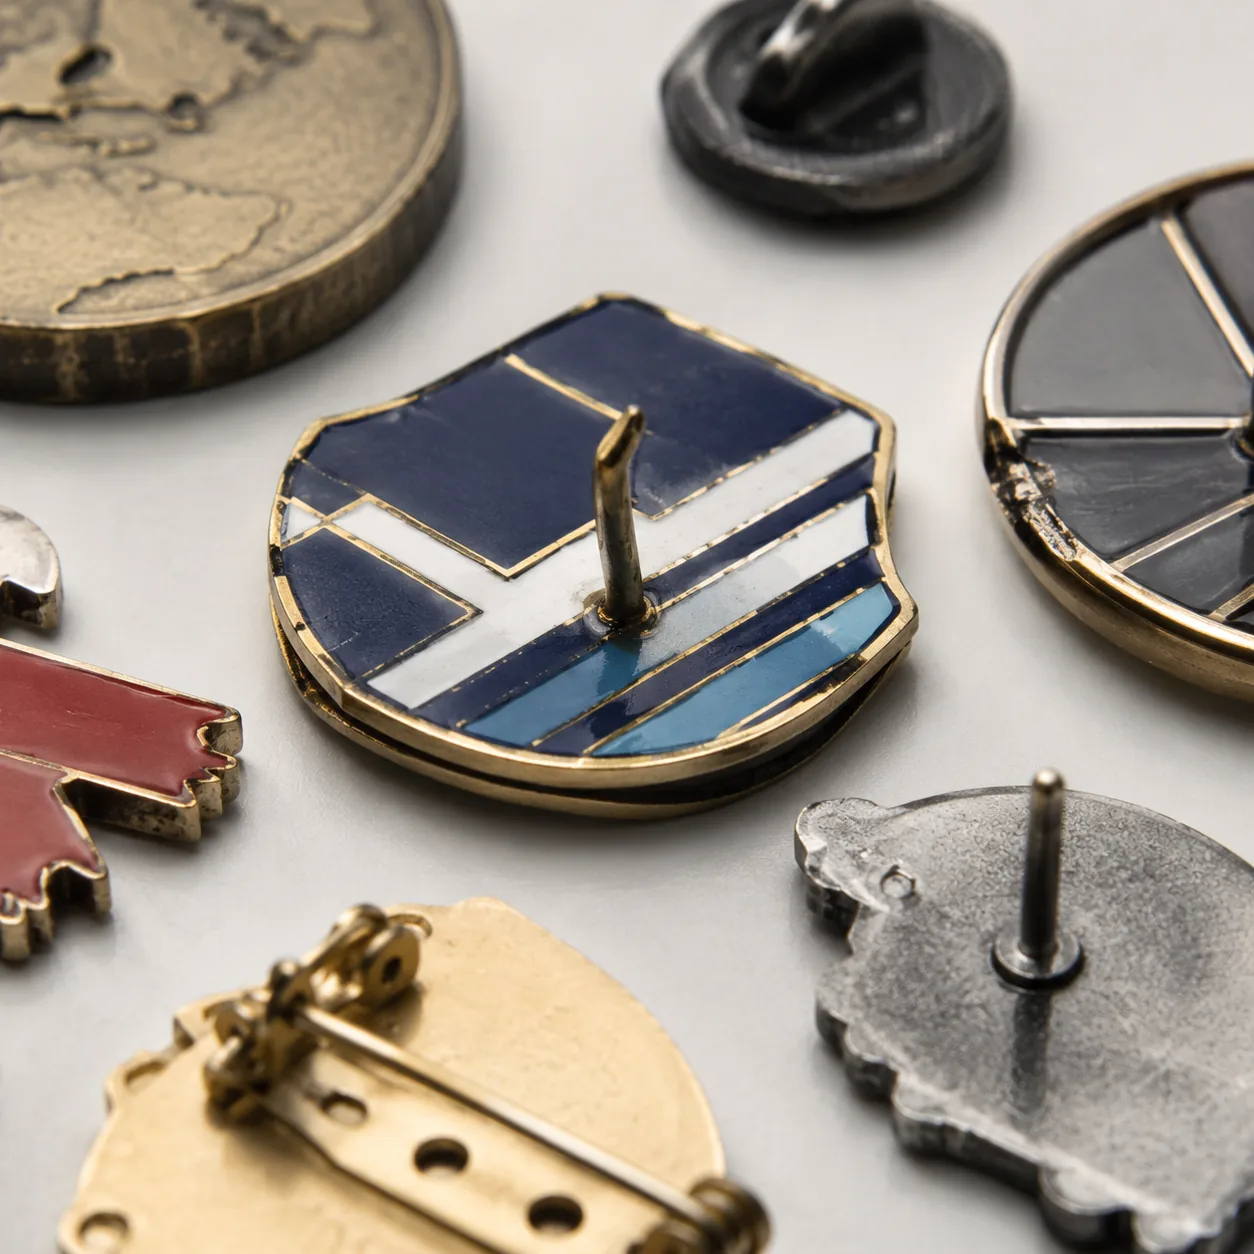
Failure Mode 4: Backing, Attachments, and Hardware Looseness
Hardware failures are responsible for a lot of “product defect” complaints that are really attachment design problems. A pin can have perfect front-side quality and still return from a customer because the clutch spins, the magnet slips, or the post length is wrong for the garment. The factory needs to know whether the product is meant for thick uniforms, thin fashion fabric, bags, or hard surfaces, because the correct backing changes with use case.
For lapel pins, specify post diameter, post length, and clasp type together. A butterfly clutch is fine for lightweight giveaways, but a stronger rubber clutch or magnetic backing may be better when fabric damage must be avoided. For badges and brooches, ask for anti-rotation features if the item has a larger face, because a single post without a stabilizer often causes visible tilt.
- Specify the garment or substrate thickness the item must fit.
- State whether rotation, sagging, or puncture is the main risk.
- Require a hardware photo on the sample, not only the front view.
- Ask for pull-testing or retention checks where the use case justifies it.
Failure Mode 5: Dimension Drift and Tolerance Stack-Up
A lot of disputes start because every part is within its own tolerance, yet the final assembly still fails. That is tolerance stack-up: the pin face, backing card, clasp, and insert all drift in slightly different directions until the product no longer fits, aligns, or packs cleanly. The problem is most visible in multi-item sets, where one loose component can ruin an otherwise good shipment.
The fix is to put tolerance rules on the assembly, not just the parts. If two components must nest, define the permitted gap or overlap in the assembled state. For stamped or cast metal items, a general dimensional tolerance of ±0.20 mm may be acceptable on small features, but critical interfaces often need tighter control and explicit inspection points at QC.
| Component | Common drift | What to specify |
|---|---|---|
| Face to backing card | Visible mis-centering | Centerline tolerance and allowable offset |
| Pin post to art center | Crooked appearance | Maximum angular deviation and offset |
| Box insert to product | Packing interference | Internal cavity size and insertion clearance |
Failure Mode 6: Surface Defects Hidden Until Final Inspection
Surface defects often escape early checks because they appear only after polishing, plating, or packing. Common examples include pinholes, burrs, die marks, dust inclusions, and hairline scratches that show under angled light. If the buyer only approves a front-facing photo, the factory may never hear about the defect until cartons are already complete.
This is where AQL and inspection method matter. For visual cosmetic products, a practical incoming and final inspection plan often uses AQL 2.5 for major defects and 4.0 for minor defects, but the exact threshold should match the buyer’s launch risk and channel sensitivity. The supplier should inspect under consistent lighting, at a fixed viewing distance, and against a defined defect board rather than “by eye.”
Failure Mode 7: Packing and Storage Damage After Approval
A product can pass sample approval and still fail in warehouse storage or transit. Soft coatings scuff against each other, sharp edges cut polybags, and untreated metal darkens when exposed to humidity. Many buyers only discover this after the goods arrive because the front-end sample did not represent the final packing density or carton dwell time.
The practical answer is to spec the full pack-out condition, not just the item. If the shipment will sit in transit for weeks, ask for individual polybags, desiccant where needed, and carton compression limits. For retail-ready items, specify whether the backing card, insert, or pouch is part of the quality acceptance, because a damaged presentation layer can trigger a rejection even if the product itself is sound.
- Define the pack-out exactly as it will ship.
- State whether surface-to-surface contact is allowed.
- Add humidity-sensitive protections if storage is long or coastal.
- Request a carton drop or compression check when the route is rough.
What To Do Next
Start by rewriting your RFQ around the top three failure modes for your product, not around the product category alone. For example, a pin buyer should state the smallest readable text, the intended backing, the target finish, and the acceptable cosmetic defect level in one place. A coin or badge buyer should add the critical diameter, rim height, and assembly tolerance so the factory knows where not to improvise.
If you want fewer rounds of sampling, ask the supplier to confirm the weakest point before tooling starts. In practice, that means one pre-production sample, one marked-up defect review, and one written approval note that locks the key specs. ZheCraft can support this workflow by mapping the likely failure mode to the process step, then quoting the process that actually controls it instead of the cheapest-looking version.
The next order should not be about hoping the factory gets it right. It should be about making the wrong outcome hard to produce.
Have a project? Send your artwork and target quantity and we’ll reply with a detailed quotation within 12 working hours.
Ready to get this made?
Send your sketch, target quantity and ship-date. Detailed quotation in 12 hours.


