Edge Finishing Specs for Custom Pins, Coins and Keychains
Why edge finish fails after artwork approval
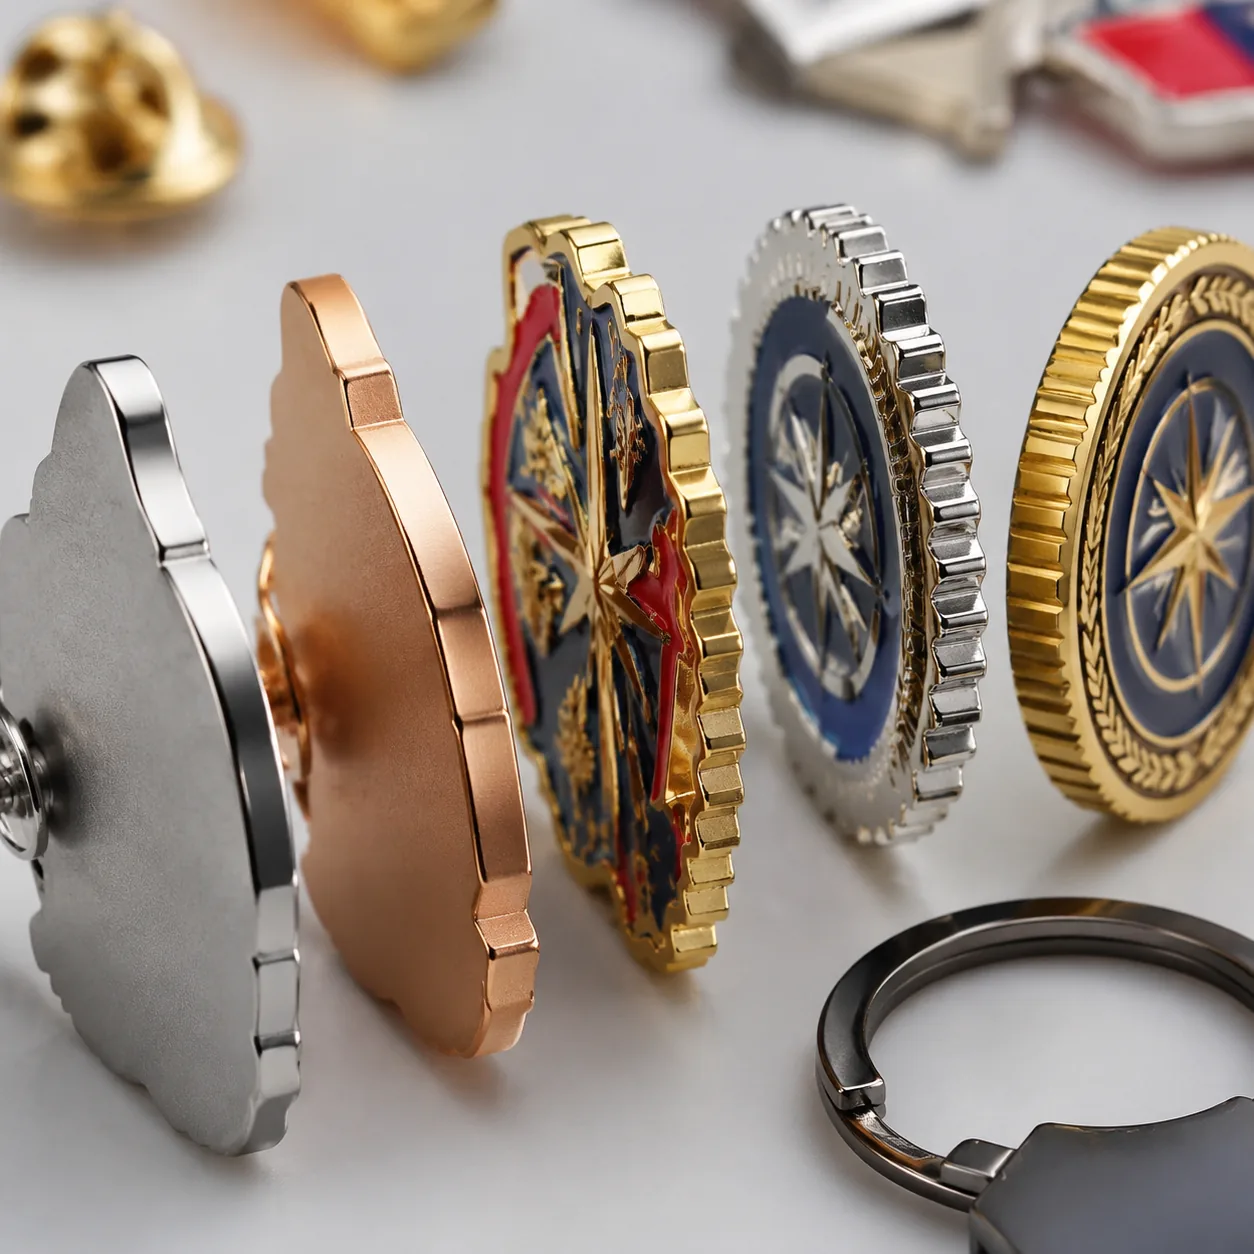
A custom metal item can pass artwork proofing, PMS color matching and front-face plating inspection, then still fail in use because the perimeter cuts a pouch, scratches a phone case or feels unfinished. The usual problem is not the visible front face. It is the outer wall, rear edge, keyring hole, bottle-opener lip, connector slot or die-cast parting line.
The risk changes sharply by product. A 30 to 35 mm soft enamel pin in 1.2 mm iron often needs only clean trimming and light deburring. A 50 to 60 mm zinc alloy keychain in 3.0 mm thickness, carried with keys and a phone, needs controlled rounding around the outside profile and a separate check inside the ring hole. Challenge coins sit between those categories: they are handled often, but the edge can be chamfered without changing the front artwork.
The commercial issue is that phrases such as smooth edge, polished edge or premium finish are not specifications. One factory may quote basic tumbling, while another includes gate grinding, hand polishing and tighter final inspection. On typical B2B programs, the difference can add 0.03 to 0.18 USD per piece FOB China and 1 to 4 production days, depending on metal, thickness, outline complexity and order quantity.
A reliable RFQ defines edge finish before tooling: base metal, nominal thickness, radius or chamfer target, burr limit, plating finish, critical zones and AQL level. That prevents late disputes where the buyer expects a retail hand-contact edge but the supplier quoted a standard promotional edge.
Match the edge class to product use
Not every pin, coin or keychain needs a mirror-polished rounded perimeter. Over-specifying low-contact products raises cost and can soften artwork details. Under-specifying pocket-contact products creates safety complaints, plating rub-off and assembly rejects.
Use contact risk as the first decision point. Display magnets, backing-card pins and sealed promotional badges usually need visible burr removal and no needle-like points. Hand-contact coins and medallions need a soft chamfer or radius that feels clean under thumb pressure. Pocket-contact keychains, zipper pulls and bottle openers need the most attention because they rub against skin, bags, phones and plated hardware.
| Contact class | Typical product | Measurable edge specification | Inspection focus |
|---|---|---|---|
| Low contact | Fridge magnet, display badge, backing-card pin | No visible loose burr; no cutting feel on light finger pass; outline tolerance ±0.15 mm for stamped parts | Outer perimeter and rear edge |
| Fabric contact | Lapel pin, brooch, name badge | Rear edge deburred; no raised plating bead; pin post area flat within 0.20 mm | Back side, pin post weld and clutch area |
| Hand contact | Challenge coin, medallion, award token | 0.10 to 0.25 mm radius or 0.20 to 0.35 mm chamfer where accessible; burr height ≤0.05 mm | Coin rim, grooves and antique recess transitions |
| Pocket contact | Keychain, zipper pull, bag charm | 0.20 to 0.40 mm outside radius; hole wall deburred; no exposed base metal after plating | Keyring hole, jump-ring slot, gate mark and corners |
| Child-facing or school use | School pins, charms, event keychains | No needle-like points; minimum outside corner radius 0.50 mm where artwork allows; sharp-edge defects treated as critical | All corners, cutouts and hardware zones |
If the approved logo contains thin spikes, narrow tails or deep V-notches, the buyer may need to choose between exact artwork replication and safer handling. For school or youth programs, safety should override exact reproduction of sub-0.5 mm points.
Write radius, chamfer and burr limits in millimeters
Edge finish must be measurable. A stronger specification is: outer edge radius 0.20 to 0.30 mm where geometry allows; no continuous burr above 0.05 mm; no cotton snag on outer edge, keyring hole or cutout; sharp points classified as major or critical defects. This gives production and QC the same target.
Typical tolerances depend on process. Die-struck iron or brass pins in 1.2 to 1.8 mm thickness can usually hold outline tolerance of ±0.10 to ±0.15 mm after trimming and deburring. Die-cast zinc alloy keychains and coins in 2.5 to 4.0 mm thickness are commonly controlled to ±0.15 to ±0.25 mm because mold parting lines, shrinkage and gate finishing add variation. Thin etched stainless steel items in 0.6 to 1.0 mm thickness should not be aggressively rounded because small details can bend or lose definition.
Avoid applying one radius to every surface. An outside perimeter may accept a 0.30 mm radius, while a 1.5 mm inside cutout cannot be polished to the same level without distortion. For narrow openwork, specify no loose burr, no cutting edge and no cotton snag, rather than a fixed radius that the geometry cannot support.
- State base metal and nominal thickness first, such as zinc alloy 3.0 mm, brass 1.5 mm, iron 1.2 mm or stainless steel 0.8 mm.
- Define edge geometry in millimeters: 0.20 to 0.40 mm radius, 0.20 to 0.35 mm chamfer, or deburr only.
- Set burr limits by risk: promotional standard ≤0.10 mm; retail hand-contact standard ≤0.05 mm; child-facing products should have no detectable cutting point.
- Call out critical zones separately: keyring holes, bottle-opener lips, brooch ends, magnet recesses, jump-ring slots and sharp logo points.
- Allow practical exceptions for inside corners under 2.0 mm wide, antique texture recesses and thin stainless profiles where heavy polishing may distort the part.
- Keep one approved physical sample showing acceptable edge feel, not only acceptable front artwork.
Choose the finishing process before quoting
Edge finishing is a process route, not a single operation. Common steps include trimming, gate cutting, belt grinding, hand filing, vibratory tumbling, centrifugal polishing, magnetic polishing, buffing, plating and post-plating inspection. Each removes material differently, so the correct route depends on metal, part thickness, outline complexity and cosmetic target.
For standard enamel pins from 100 to 5,000 pieces, trimming plus vibratory tumbling is normally adequate. The FOB impact is usually 0.01 to 0.04 USD per piece because small parts run efficiently in batches. For die-cast zinc alloy keychains, bottle openers and thick coins, parting-line removal and gate blending are more labor-dependent. That commonly adds 0.04 to 0.12 USD per piece and 1 to 2 working days.
Mirror-finished edges require more controlled grinding before plating and careful buffing after plating. They suit premium coins, executive gifts and retail keychains, but they are not always suitable for antique finishes, deep recessed enamel or dense openwork. Excess buffing can round raised details, expose waves in the casting and increase rejection after plating.
| Process route | Best application | Typical material removal | FOB impact per piece | Lead-time impact |
|---|---|---|---|---|
| Trim and basic deburr | Simple soft enamel pins and badges | Loose burr removal; minimal edge rounding | 0.01 to 0.03 USD | 0 to 1 day |
| Vibratory tumbling | Small iron, brass and zinc alloy parts | Softens edge by about 0.03 to 0.10 mm | 0.02 to 0.05 USD | 0 to 1 day |
| Centrifugal or magnetic polish | Small parts with many short edges or cutouts | Fine burr removal before plating; limited radius control | 0.03 to 0.08 USD | 1 day |
| Hand filing and gate blending | Die-cast keychains, bottle openers and irregular coins | Targets gates, parting lines and inside corners | 0.04 to 0.12 USD | 1 to 2 days |
| Controlled chamfer grinding | Coins, medals and thick zinc alloy bodies | Creates 0.20 to 0.35 mm chamfer on accessible edges | 0.06 to 0.14 USD | 1 to 3 days |
| Mirror edge buffing | Premium coins and retail keychains | Bright reflective edge with soft radius | 0.08 to 0.18 USD | 2 to 4 days |
MOQ also affects finishing consistency. At 100 to 300 pieces, handwork variation is easier to monitor but unit cost is higher. At 1,000 to 5,000 pieces, the process must be locked with samples, work instructions and in-process checks, otherwise different operators may polish edges to different levels.
Control plating build-up and edge wear
Plating does not fix a poor edge. It can make the defect more visible. Nickel, gold, black nickel and chrome build slightly on high points, so a rough burr before plating becomes a harder, brighter burr after plating. Antique finishes hide minor scratches better, but dark oxide can collect in rough edges and make the perimeter look dirty.
For promotional metal products, total decorative plating thickness is often 3 to 8 microns. A common stack is copper strike at 1 to 3 microns, nickel at 3 to 6 microns and a thin decorative gold, brass, black nickel or imitation gold layer. Higher-wear retail keychains may require thicker nickel or protective clear coat, but the base edge still must be deburred first. A 0.10 mm metal burr is 100 microns high; a few microns of plating will not make it safe.
For outdoor or high-rub use, specify both edge finish and plating performance. A practical keychain requirement is: no exposed base metal on outer edge after plating; no edge burn, skip plating or black spots at 30 cm viewing distance under 600 to 800 lux; 24 to 48 hour neutral salt spray target if corrosion resistance is part of the program. Painted color fills or black painted edges should be avoided on high-rub pocket items unless visible wear is acceptable.
Assembly can also damage plating. Split rings, chains and lobster clasps rub inside holes during packing and transport. For zinc alloy keychains, a 3.0 to 4.0 mm ring hole suits standard split rings; heavier chains often need 4.5 to 5.0 mm. Keep at least 2.5 mm of metal from hole edge to outer profile on zinc alloy and at least 2.0 mm on brass or stainless steel where design size allows.
Inspect edges with tactile and visual checks
Edge defects are easy to miss when QC focuses on front artwork and color. Inspectors should rotate the part under light, run a gloved finger around the perimeter, check holes and cutouts separately, and use a cotton-swipe test on high-contact items. If cotton fibers snag, the part needs rework or rejection depending on location and severity.
For normal B2B promotional orders, AQL 2.5 for major defects and AQL 4.0 for minor defects is common. For school items, child-facing campaigns, retail pocket goods or bottle openers, sharp-edge defects should be tightened to AQL 1.0 or treated as critical with 100 percent checking of defined zones. Keyring holes, gate marks and bottle-opener lips should be inspected before plating whenever possible because post-plating repair can expose base metal or leave a visible finish mismatch.
Defect classification must be agreed before production. A skin-scratching point, metal sliver, sharp hook inside a keyring hole or burr that cuts packaging should be major or critical. A slight polishing wave on the side wall of an antique coin may be minor if it is not visible at 30 cm and does not affect handling.
- Inspect edges under 600 to 800 lux light at about 30 cm, rotating the part to catch bright burrs and plating build-up.
- Run cotton along outer edges, keyring holes, brooch ends, cutouts and bottle-opener lips; reject any snagging burr on critical zones.
- Use calipers to verify thickness tolerance: commonly ±0.10 mm for pins and ±0.15 to ±0.25 mm for thicker cast zinc alloy parts.
- Check plating coverage on edges for exposed base metal, edge burn, rough nickel build-up, black spots and color mismatch.
- Classify skin-scratching points as major or critical based on use case, market and buyer safety requirements.
- Retain a signed golden sample and edge defect board for mass production comparison.
Design for easier edge finishing
The lowest-cost edge control starts in the artwork. Sharp star points, thin tails, deep V-notches, long unsupported slots and narrow cutouts all increase burr risk. For general promotional use, a minimum outside corner radius of 0.30 mm is practical where the logo allows. For child-facing or school use, 0.50 mm is safer and easier to inspect consistently.
For enamel pins, logo points below 0.5 mm width are hard to trim, polish and fill cleanly with enamel. For die-struck brass or iron pins, raise and recess transitions should avoid knife-like ridges near the outer profile. For soft enamel, leave enough metal wall around color cells; very thin walls can become rough after polishing and plating.
For challenge coins, avoid specifying a perfectly sharp square rim on coins above 3.0 mm thickness if the coin will be carried in a pocket. A 0.20 to 0.35 mm chamfer improves comfort while preserving the face design. For antique coins, a slightly softened rim usually looks more intentional than a polished edge fighting against a dark antique finish.
For keychains and zipper pulls, place ring holes where polishing tools can reach. Holes too close to the outer profile create thin walls that deform during tumbling and show plating build-up. As a rule, keep the wall around the hole at least 0.8 mm thick for light parts and 1.2 mm or more for heavier zinc alloy bodies.
Plan MOQ, samples and lead time around edges
Edge feel cannot be approved from a digital proof. Photos and videos help, but they rarely show burr height, cotton snagging or the way a hole feels after plating. For irregular outlines, thick zinc alloy bodies, pocket-use items or retail programs above 1,000 pieces, request a physical pre-production sample and test it with the intended hardware.
Typical MOQ for custom pins, coins and keychains is 100 pieces per design, but complex hand-finished products are more efficient at 300 pieces and above. Sample lead time is usually 5 to 9 days for enamel pins, 7 to 12 days for zinc alloy keychains and 8 to 14 days for thick challenge coins after artwork confirmation. Mass production after sample approval is commonly 12 to 20 days for 100 to 3,000 pieces, and 18 to 35 days for larger or multi-SKU orders.
| Order profile | Recommended sample check | Practical MOQ tier | Typical production lead time |
|---|---|---|---|
| Simple enamel pin, 25 to 35 mm | One pre-production sample; confirm rear edge and post area | 100 to 300 pcs | 12 to 18 days after approval |
| Irregular logo pin with sharp points | Sample plus cotton-swipe check on all points and cutouts | 300 to 1,000 pcs | 15 to 22 days after approval |
| Zinc alloy keychain, 45 to 60 mm | Sample assembled with ring; inspect hole wall and gate area | 300 to 1,000 pcs | 16 to 24 days after approval |
| Premium challenge coin, 40 to 50 mm | Compare chamfer, radius or mirror edge before locking route | 100 to 500 pcs | 18 to 28 days after approval |
| Retail multi-SKU set | Golden sample and shared edge defect standard for each SKU | 500 sets and above | 22 to 35 days after approval |
The best RFQ note is short but measurable: zinc alloy 3.0 mm; outer edge radius 0.20 to 0.30 mm where accessible; no burr above 0.05 mm; 100 percent check on keyring hole; nickel plating 3 to 6 microns over copper strike; AQL 2.5 major and 4.0 minor, with sharp edges classified as major. With that level of detail, the factory can quote the correct process route, build the edge checks into sampling and reduce late rework before shipment.
Have a project? Send your artwork and target quantity and we’ll reply with a detailed quotation within 12 working hours.
Ready to get this made?
Send your sketch, target quantity and ship-date. Detailed quotation in 12 hours.


