Die-Struck vs Printed Pins for 2026 Campaign Deadlines
When the deadline is fixed, process choice matters more than a lower unit price
A frequent 2026 sourcing mistake is treating die-struck and printed pins as interchangeable because the artwork preview looks similar on screen. In production they are different constructions with different tooling paths, line limits, finishing steps and defect patterns. The wrong choice can add 5 to 8 working days through redraws, extra sample rounds or plating and print corrections, especially when artwork includes gradients, sponsor rows, small copy, thin borders or tight interior cutouts.
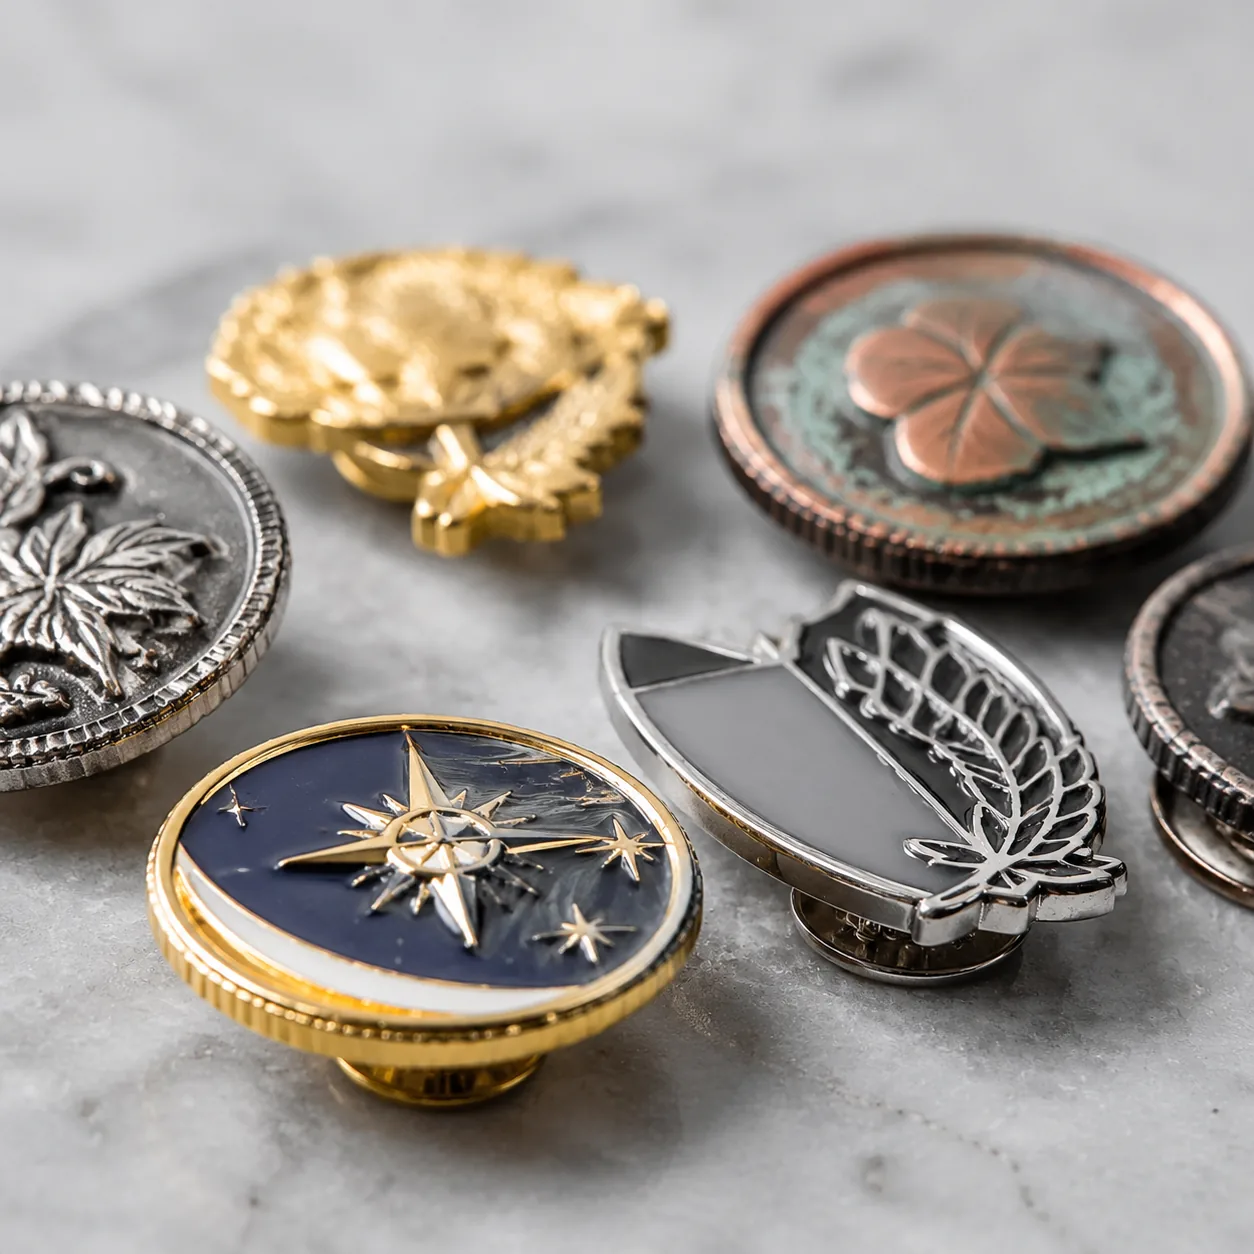
For campaign buyers, distributors and event teams, the decision is operational as much as visual. Die-struck pins build detail through stamped metal relief, then depend on polishing, plating uniformity and clean edges to deliver a premium feel. Printed pins place the image by offset or UV print on a flat metal blank, usually sealed with an epoxy dome 0.2 to 0.4 mm thick, so they handle dense graphics, tonal transitions and fine copy with fewer art compromises. The right route depends on what the pin must do: communicate prestige, carry information, survive repeated wear, or hit a non-movable launch date.
The practical split is straightforward. Die-struck pins reward bold logos, clear separations, plated contrast and tactile presentation. Printed pins are better when the design starts as digital artwork and includes mascot art, maps, building illustrations, gradients, multilingual text or multiple sponsor marks. Both can be good products; they simply solve different manufacturing problems and create different approval risks.
Head-to-head specs: cost, speed, tolerances and failure points
| Spec point | Die-struck metal pin | Printed metal pin |
|---|---|---|
| Best use case | Premium logos, award pins, collector emblems, minimalist brand marks | Detailed illustrations, gradients, mascots, maps, event graphics, sponsor-heavy layouts |
| Common materials | Brass or iron; brass gives cleaner stamping, smoother edges and more stable plating | Brass, stainless steel or aluminum; brass and stainless usually give flatter, more stable print surfaces |
| Recommended size range | 20 to 45 mm standard; 50 mm possible with 1.5 to 1.8 mm body and 2 posts | 20 to 60 mm standard; larger sizes improve legibility for image-heavy art |
| Typical thickness | 1.2 to 1.8 mm body; 1.5 mm is a common premium spec | 0.8 to 1.2 mm base plus 0.2 to 0.4 mm epoxy dome |
| Minimum line capability | Raised metal line 0.25 mm minimum; 0.30 to 0.35 mm safer for repeat production | Printed line 0.10 to 0.15 mm if blank flatness and registration are controlled |
| Minimum text guidance | Below 5 pt usually needs simplification; 6 pt is safer after plating and polishing | 4 pt may work on simple fonts; 5 to 6 pt is safer after epoxy |
| Relief or image capability | Good for bold relief; poor for gradients or photo-like detail | Good for tonal transitions, photos, maps and dense multicolor layouts |
| Standard MOQ tiers | 100 pcs minimum; typical breaks at 300, 500, 1000, 3000 | 100 pcs minimum; typical breaks at 200, 500, 1000, 3000 |
| Typical tooling or setup | Mold charge USD 60 to 150; complex cutouts or irregular outlines can reach USD 180 to 220 | Setup charge USD 0 to 60; standard round or square blanks are often no-tooling |
| Pre-production sample lead time | 7 to 10 days after artwork approval; 10 to 12 days with cutouts, dual plating or custom backstamps | 4 to 7 days after artwork approval; 6 to 8 days if Pantone matching is strict |
| Mass production lead time | 10 to 18 days after sample approval; 12 to 20 days for complex plating, sandblast textures or 2-post alignment | 7 to 12 days after sample approval; 8 to 14 days if epoxy curing, print queue or custom packing is tight |
| Typical FOB unit price at 300 pcs | USD 0.68 to 1.25 for 30 mm simple shape, 1 post, standard plating | USD 0.55 to 0.98 for 30 mm epoxy printed pin, standard shape |
| Typical FOB unit price at 500 pcs | USD 0.48 to 0.95 | USD 0.42 to 0.78 |
| Typical FOB unit price at 3000 pcs | USD 0.22 to 0.48 | USD 0.18 to 0.36 |
| Recommended tolerance checks | Thickness ±0.10 mm; size ±0.20 mm; post position ±0.50 mm; visible edge burr under 0.10 mm | Thickness ±0.10 mm; print registration ±0.15 mm; epoxy overflow no more than 0.20 mm; dome height variation within ±0.10 mm |
| Attachment compatibility | Butterfly clutch, rubber clutch, deluxe clutch, magnet, safety pin | Same options, but larger thin faces often need 2 posts or stronger backing |
| Main rejection causes | Thin metal lines, shallow stamping, plating pits, rough edges, weak solder, distorted cutouts | Color shift, misregistration, dust under epoxy, epoxy voids, scratches, dome yellowing from low-grade resin |
| AQL recommendation | Critical 0, major 2.5, minor 4.0 | Critical 0, major 2.5, minor 4.0 with explicit print and epoxy defect definitions |
If the pin must feel tactile, gift-like and metal-forward, die-struck usually wins. If the design contains sub-0.25 mm interior detail, sponsor rows, multilingual copy or tonal shading, printed metal is usually the safer route. Many missed launch dates happen because buyers push screen-style artwork into a relief process that cannot reproduce it reliably.
Artwork stress test: what each process can actually reproduce
Die-struck pins depend on die geometry, metal flow and post-stamping finishing. Raised borders need enough width to stamp cleanly, survive polishing and remain visible after plating, so 0.25 mm is a practical minimum and 0.30 to 0.35 mm is safer for production repeatability. Interior gaps below about 0.40 mm, enclosed counters in letters such as A, R, P and e, or isolated islands below 0.50 mm raise the risk of fill-in, deformation or visual loss after plating. Relief depth matters as well: many factories target roughly 0.15 to 0.25 mm visible level difference on standard promotional pins. If relief is too shallow, polishing can soften contrast and make the design look flat.
Printed pins are more forgiving because the image comes from ink, not metal walls. That makes them better for building facades, sports jerseys, flags, character art, transit maps and digital campaign graphics. But print is not infinite precision. If the blank is not flat, or registration drifts beyond about ±0.15 mm, thin outlines and small text blur quickly. Epoxy also changes perceived edges, so critical details should stay at least 0.50 mm inside the outer perimeter and at least 0.30 mm away from any drilled hole or cutout. For reverse text, maintain enough contrast because epoxy can slightly magnify edge softness.
A practical rule is simple. If recognition depends on metal outline, reflective plating and tactile relief, start with die-struck. If recognition depends on image detail, gradients or small-copy legibility, start with printed. For 2026 campaigns, where teams often reuse social graphics, web banners and sponsor decks, printed pins usually require fewer redraws and fewer sample disputes.
Lead time and schedule risk: which route is safer under 2026 deadlines
Printed pins usually carry lower schedule risk because they avoid deep mold development and heavy polishing. A realistic planning window is 4 to 7 calendar days for pre-production samples and 7 to 12 calendar days for bulk production after approval. Standard round, square or oval blanks can sometimes save 1 to 2 working days because tooling is not required and print setup is straightforward. That speed only holds if artwork is final, epoxy curing is not rushed and packaging is simple, such as individual polybags rather than custom cards with barcode labeling.
Die-struck pins are not slow by default, but they include more physical steps: mold engraving, stamping, trimming, deburring, polishing, plating, post soldering and final inspection. Standard sample timing is usually 7 to 10 days, and production is commonly 10 to 18 days after sample approval. Add 2 to 4 more days if the design includes interior cutouts, sandblasted backgrounds, dual plating, laser backmarks, custom backstamps or two attachment posts that need accurate alignment.
Rush orders widen the process gap. Printed pins are easier to accelerate if the art is stable and the buyer accepts one visual sample round instead of multiple Pantone corrections. Die-struck pins are harder to compress because less polishing time or shorter plating dwell time directly increases visible defects such as rough edges, inconsistent luster, plating burn or shallow detail. Printed is not automatically risk-free, however. Brand owners with strict Pantone targets can still lose days in approval when color shifts on stainless or aluminum differ from paper proofs.
For a fixed event date, count backward from ex-factory ship date, not from the day artwork is emailed. A conservative model is 5 to 7 days for internal approvals, 4 to 10 days for sampling depending on route, 7 to 18 days for production, and 3 to 5 days of buffer for inspection, carton marking and booking corrections. If delivery is tied to a campaign launch, that buffer is often the difference between an on-time shipment and a rushed remake.
Cost, MOQ and total failure cost: the invoice is only half the decision
Printed pins often appear cheaper, especially below 1000 pieces, because setup is lighter and fine detail does not need to be translated into metal walls. At 500 pieces for a 30 mm standard shape, printed epoxy pins commonly land around FOB USD 0.42 to 0.78, while die-struck equivalents run around FOB USD 0.48 to 0.95 depending on thickness, plating, cutouts and attachment count. At 300 pieces, the gap usually widens because a mold charge of USD 60 to 150 is spread across fewer units.
The more important cost is failure cost. A die-struck concept with 0.20 mm lines may require two redraw rounds and a second sample cycle, which can erase any prestige benefit if the event date is fixed. A printed pin chosen for executive gifting may save USD 0.10 to 0.20 per piece yet create replacement cost if the face scratches in transit or the epoxy looks less refined under showroom lighting. The correct buying question is not which quote is lower, but which route reaches approval with the lowest chance of rework and delay.
MOQ strategy also matters. Many factories list 100 pieces as the minimum, but the true commercial price breaks are usually 300, 500, 1000 and 3000 pieces. Printed pins are more flexible for uncertain demand because art changes are easier and setup is lighter. Die-struck becomes more attractive for stable annual programs because the mold can often be reused for 12 to 24 months if stored properly, lowering repeat-order setup cost and improving consistency across batches.
A concrete example helps. A 35 mm campaign pin at 500 pieces may cost about USD 310 FOB as printed epoxy versus about USD 385 FOB as die-struck after tooling. If the printed route avoids one failed sample and ships 6 days earlier, it is usually the lower-risk commercial choice. If the same design becomes a year-round recognition item reordered at 5000 pieces, die-struck often closes the cost gap while delivering stronger perceived value.
Durability, finish quality and return risk in real use
Die-struck pins usually age better because the visual identity is formed into the metal itself. Decorative nickel, gold or black nickel on promotional pins is often a flash decorative finish in the approximate 0.03 to 0.08 micron range, though exact build depends on chemistry and supplier controls. Buyers should not focus on micron alone. More important are plating evenness, polishing quality, burr control and solder strength. Raised metal can still scratch, but the pin generally keeps its premium look longer than a printed face exposed to repeated friction.
Printed pins depend more on surface protection. Without epoxy, scratch risk during packing, transit and wear is high. With epoxy, durability improves significantly, but the approval sheet should define the standard clearly: no trapped dust visible at 30 cm under normal office lighting, no bubble clusters, no obvious orange peel, no sink marks over key artwork, and epoxy overflow no greater than 0.20 mm on visible edges. For long-retention programs, ask about UV stability and yellowing resistance. Lower-grade epoxy can amber over time, especially in warm retail displays or sunlit storage.
Return risk is also mechanical. A 50 mm printed pin built on a 0.8 mm aluminum base with one post is much more likely to rotate, bend or detach than a 30 mm die-struck brass pin with 1.5 mm thickness and two posts. As a working rule, anything wider than 40 mm, strongly asymmetrical, or intended for softer garments should be reviewed for two posts, a deluxe clutch or a magnet backing if fabric damage matters.
If the pins will be sold at retail or included in membership kits, add simple durability checks to the spec pack: post pull test, clutch fit consistency, tape adhesion for printed faces and a basic bag-rub or drop check on packed samples. These low-cost controls catch many field failures before mass production ships.
QC checkpoints buyers should lock before approval
- For die-struck pins, confirm minimum metal line width, target relief depth of 0.15 to 0.25 mm, overall thickness tolerance of ±0.10 mm, acceptable burr limit under 0.10 mm and minimum post pull strength before approving plating.
- For printed pins, confirm print registration tolerance of ±0.15 mm, Pantone match method or approved visual target, epoxy overflow limit of 0.20 mm maximum and dust inspection under strong light before packing.
- Use AQL critical 0, major 2.5, minor 4.0 as a default, then define route-specific major defects in writing such as plating pits, exposed base metal, weak solder, visible bubbles, misregistration or color shift beyond the approved standard.
- For humid storage or longer program life, request tape adhesion testing for print or plating and a basic 24 to 48 hour salt-spray or corrosion check when finish appearance is part of the selling point.
- For orders above 3000 pieces or repeat campaigns, require the factory to retain the approved sample, plating reference and print color target so reorders stay aligned.
- If the pin exceeds 40 mm, has a top-heavy silhouette or uses a thin base, confirm whether two posts are mandatory to reduce rotation complaints and field returns.
- Lock packaging before production starts: individual polybag, backer card, barcode label and carton count all affect scratch rate, counting accuracy and ship-date reliability.
A generic inspection sheet is rarely enough. Die-struck and printed pins fail in different ways, so the QC checklist should match the build route. If a supplier can quote quickly but cannot explain likely defect modes by process, that is usually a warning sign that commercial response is stronger than production control.
Best-fit scenarios and a faster RFQ method
Case one is a corporate recognition pin for distributors, sales awards or service milestones. The artwork is a simple crest or monogram, the finish must feel executive and the item may be worn for years. Die-struck is usually the better fit. A 30 to 35 mm brass body at 1.5 mm thickness with bright gold or nickel plating, sandblasted recessed background and two butterfly clutches gives a solid hand feel and lower long-term return risk. Typical total lead time is about 18 to 25 days including sampling.
Case two is a museum, tourism, school or sports-event pin with illustration, seasonal graphics or location-specific text. Printed metal is usually cleaner because it preserves approved art without heavy simplification. A 30 to 45 mm brass or stainless base at 1.0 mm thickness with epoxy and one or two posts typically balances detail, cost and speed. At 500 pieces, FOB pricing often lands in the USD 0.45 to 0.85 range depending on size, packing and backing choice.
Case three is a multi-region 2026 campaign rollout where sponsor logos may change late and final quantities are uncertain. Printed pins are usually safer because they reduce redraw risk and support faster revisions. If the design proves stable and annual volumes move above 3000 pieces, a later reorder can be converted to die-struck for a more premium long-term version once tooling amortization makes sense.
To compare both routes without losing a week, ask suppliers for a manufacturability RFQ rather than just two prices. Request recommended process, finished size in mm, base material, thickness, attachment type, minimum line guidance, MOQ tiers, tooling or setup charge, sample days, production days, FOB prices at 300, 500 and 3000 pieces, and the top three likely defect risks. That format exposes quickly whether the factory understands the build or is only forwarding a catalog quote.
Then choose by job-to-be-done. If the pin is a prestige object, keep the artwork bold and choose die-struck. If the pin must carry visual information under time pressure, choose printed and control print plus epoxy specs tightly. The most reliable 2026 decision is not the cheapest route or the fanciest route, but the process that matches the artwork, wear conditions and delivery window without heroic fixes later. A complete approval sheet covering size, thickness, finish, color targets, quantity split, packaging, tolerances, AQL and ship date usually lets a competent factory identify the safer route in one review cycle.
Have a project? Send your artwork and target quantity and we’ll reply with a detailed quotation within 12 working hours.
Ready to get this made?
Send your sketch, target quantity and ship-date. Detailed quotation in 12 hours.


